
You’ll find 15 gingerbread house ideas that make holiday baking simple and fun, from a Candy-Cane Cottage to a Vegan Snowy Bungalow. Each recipe gives clear dough and icing tips, plus fast decorating shortcuts and suggested candy pairings. You can mix flavors like chai, lemon, or chocolate, and choose easy or detailed builds. Start with the basics, pick a style, and get your tools ready—then try the first design and see which you want next.
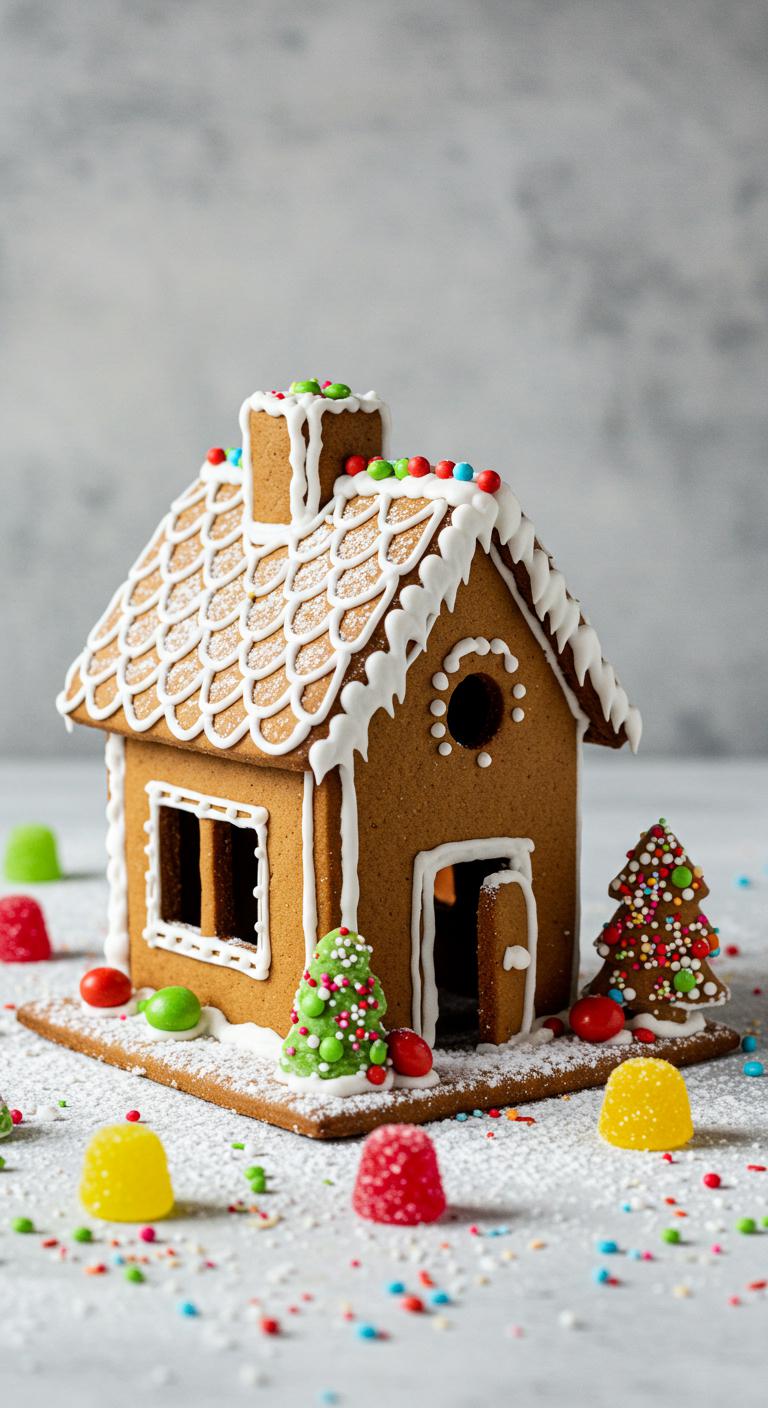
Classic Candy-Cane Cottage
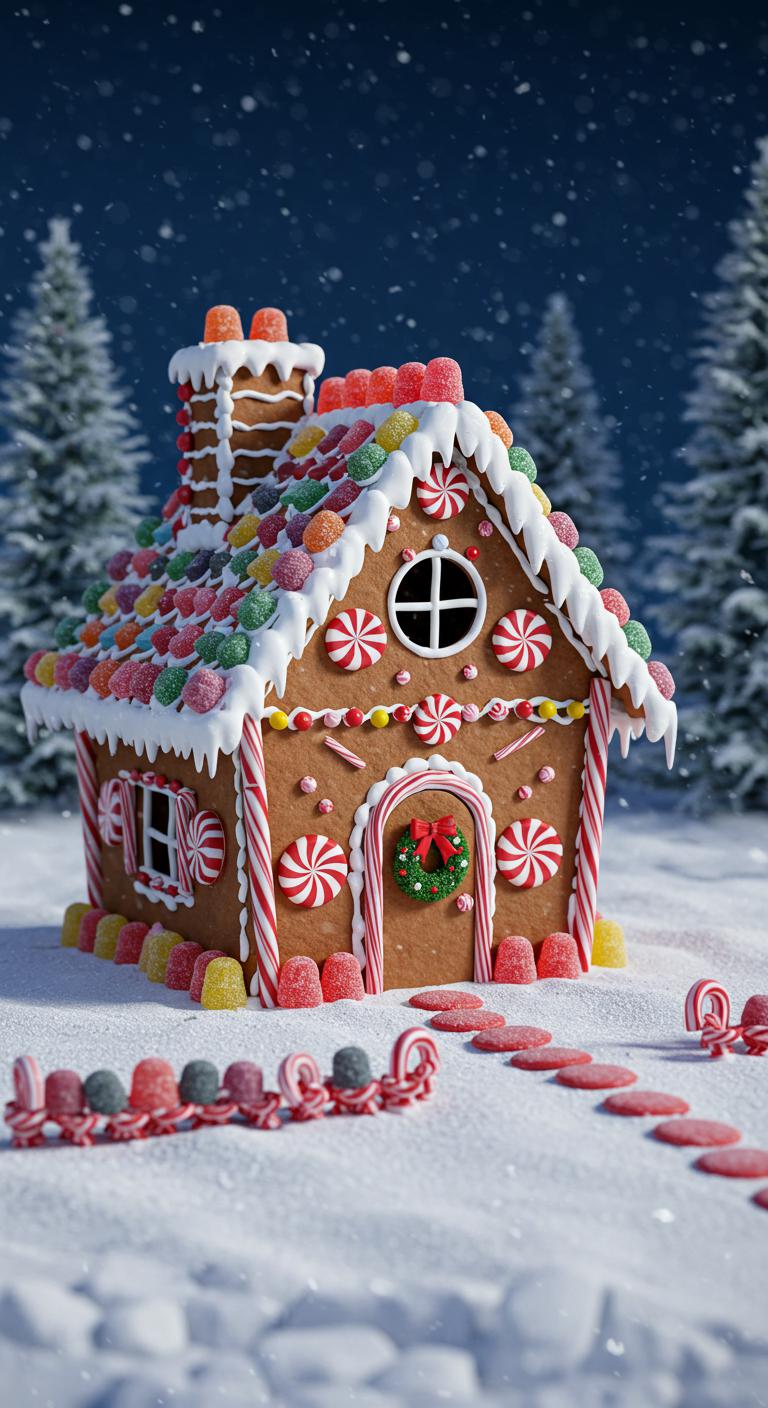
Classic Candy-Cane Cottage — a sweet, festive gingerbread house that looks like winter wrapped in peppermint.
Ingredients:
- 3 cups all-purpose flour
- 1 teaspoon baking soda
- 2 teaspoons ground ginger
- 1 teaspoon ground cinnamon
- 1/4 teaspoon ground cloves
- 1/4 teaspoon salt
- 3/4 cup (1.5 sticks) unsalted butter, softened
- 3/4 cup packed brown sugar
- 1 large egg
- 1/2 cup molasses
- 1 teaspoon vanilla extract
- Royal icing:
- 3 cups powdered sugar
- 2 large egg whites (or 1/4 cup meringue powder + 1/2 cup water)
- 1/2 teaspoon cream of tartar
- Decorations:
- Mini candy canes (8–12)
- Assorted hard candies and gumdrops
- Small peppermint candies
- Sprinkles (optional)
How to Make:
- Preheat oven to 350°F (175°C) and line baking sheets with parchment.
- Whisk flour, baking soda, ginger, cinnamon, cloves, and salt in a bowl.
- Cream the butter and brown sugar until light and fluffy.
- Beat in the egg, then stir in molasses and vanilla until smooth.
- Gradually add dry ingredients and mix until a firm dough forms.
- Divide dough in half, flatten into disks, wrap, and chill 30–60 minutes.
- Roll chilled dough on a lightly floured surface to about 1/4-inch thickness.
- Cut out house pieces using templates: two rectangles for walls, two trapezoids for roof, one rectangle for base, and optional door and window shapes.
- Transfer pieces to prepared sheets and bake 8–12 minutes until edges are set; cool completely on racks.
- Meanwhile make royal icing: beat powdered sugar, egg whites (or meringue mix), and cream of tartar until thick and pipeable; keep covered.
- Use a sturdy flat surface and pipe a line of icing along the base where walls will sit.
- Attach walls one at a time, holding briefly until set, then pipe icing along top edges and secure the roof pieces; let dry 20–30 minutes.
- Reinforce seams with more icing and allow the structure to harden 1–2 hours for stability.
- Decorate by piping icing as snow on the roof, pressing mini candy canes along the eaves, and adding peppermint candies, gumdrops, and sprinkles as desired.
- Let all decorations set completely so the house won’t shift.
Finish by enjoying your peppermint-perfect Candy-Cane Cottage — delightful to look at and even better to nibble on!
Spiced-Gumdrop Chalet
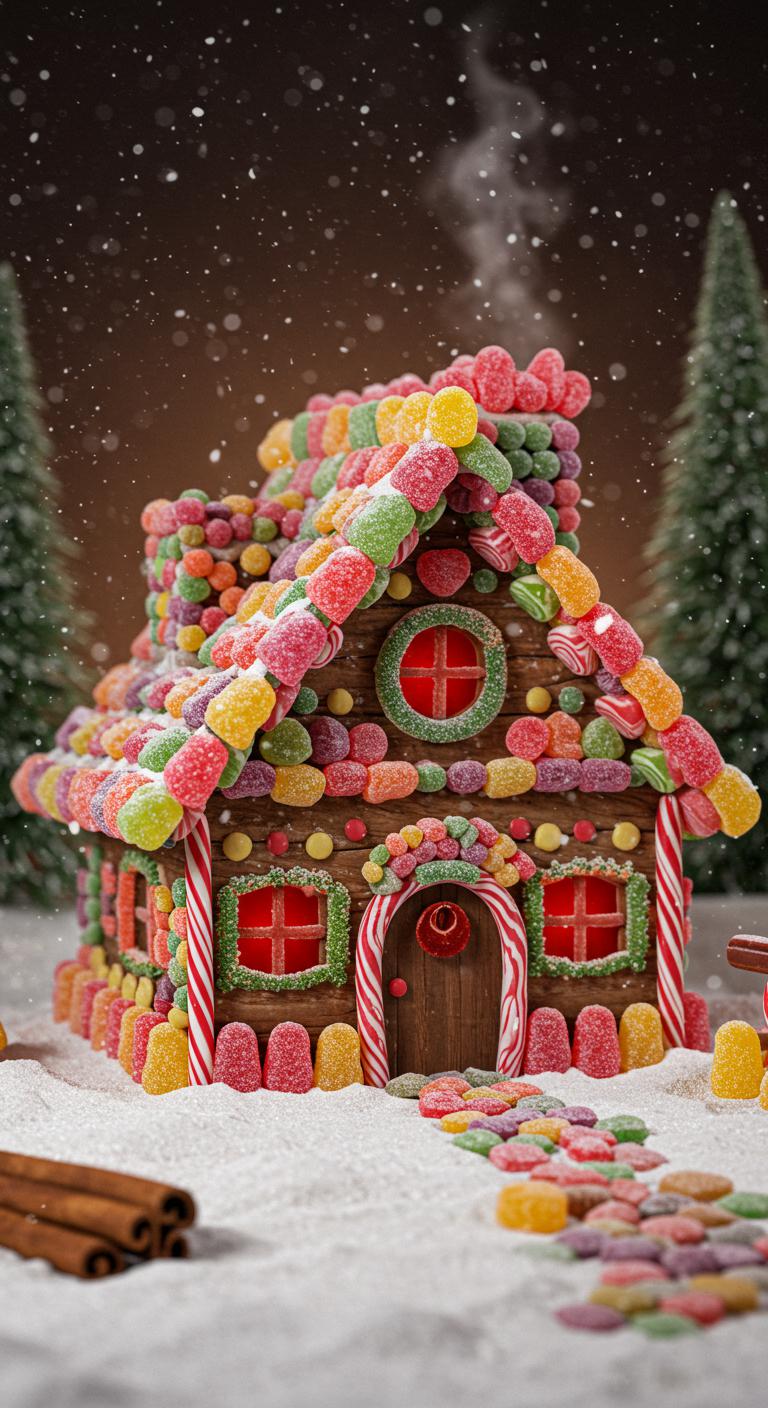
A cozy, candy-studded chalet that smells like holiday spice and childhood fun.
Ingredients:
- 3 cups all-purpose flour
- 1 tsp baking soda
- 1 tsp ground ginger
- 1 tsp ground cinnamon
- 1/2 tsp ground cloves
- 1/4 tsp ground nutmeg
- 1/2 tsp salt
- 3/4 cup (1.5 sticks) unsalted butter, softened
- 3/4 cup brown sugar, packed
- 1 large egg
- 1/2 cup molasses
- 1 tsp vanilla extract
- Royal icing for assembly and decoration (about 3 cups, see note)
- Assorted gumdrops (about 2 cups), halved or whole as preferred
- Additional candies (peppermints, mini M&Ms, candy canes) for accents
- Powdered sugar for dusting (optional)
How to Make:
- Preheat oven to 350°F (175°C). Line baking sheets with parchment.
- Whisk flour, baking soda, ginger, cinnamon, cloves, nutmeg, and salt together in a bowl.
- In a larger bowl, cream softened butter and brown sugar until light and fluffy.
- Beat in the egg, then stir in molasses and vanilla until combined.
- Gradually mix dry ingredients into wet until a smooth dough forms.
- Divide dough, wrap in plastic, and chill 30–60 minutes to firm up.
- Roll dough on a lightly floured surface to about 1/4-inch thickness.
- Cut pieces for walls, roof, and any decorative façade shapes using templates or freehand.
- Transfer pieces to prepared sheets and bake 8–12 minutes, until edges are set but not overly dark.
- Let baked pieces cool completely on wire racks before assembly.
- Make or prepare royal icing thick enough to act as glue (pipeable but stiff).
- Use icing to glue walls together on a sturdy base; let set 10–20 minutes before adding the roof.
- Attach roof panels with more icing and support them until secure; allow strong set (30–60 minutes).
- Pipe icing along seams and press gumdrops and candies into the icing to decorate the chalet roof, windows, and pathways.
- Dust lightly with powdered sugar for a snowy effect if desired.
Enjoy your spiced-gumdrop chalet—perfect for nibbling and admiring all season long!
Chocolate-Gingerbread Manor

Chocolate-Gingerbread Manor — a cozy, indulgent gingerbread house with rich chocolate notes.
Ingredients:
- 3 cups all-purpose flour
- 1/2 cup unsweetened cocoa powder
- 1 1/2 teaspoons baking soda
- 1 teaspoon ground ginger
- 1 teaspoon ground cinnamon
- 1/2 teaspoon ground cloves (optional)
- 1/2 teaspoon salt
- 3/4 cup (1 1/2 sticks) unsalted butter, softened
- 1/2 cup packed brown sugar
- 1/2 cup granulated sugar
- 1 large egg
- 1/2 cup molasses
- 2 tablespoons milk (plus more as needed)
- 1 teaspoon vanilla extract
- Royal icing for assembly (about 4 cups) or sturdy store-bought icing
- Assorted candies, chocolate pieces, and decorations for glazing and trimming
How to Make:
- Preheat your oven to 350°F (175°C) and line baking sheets with parchment.
- Whisk together flour, cocoa, baking soda, ginger, cinnamon, cloves, and salt in a bowl.
- In a large bowl, cream the softened butter with both sugars until light and fluffy.
- Beat in the egg, molasses, milk, and vanilla until smooth.
- Gradually add the dry ingredients to the wet and mix until a firm dough forms; add a splash more milk if too dry.
- Divide the dough, flatten into discs, wrap in plastic, and chill in the fridge for at least 1 hour.
- Roll chilled dough between parchment to about 1/4-inch thickness and cut pieces for your manor pattern.
- Transfer cut pieces to prepared sheets and bake 8–12 minutes, until edges are set but not overbrowned.
- Let pieces cool completely on a wire rack before handling.
- Prepare royal icing to a thick, glue-like consistency and use it to assemble walls and roof, holding pieces until the icing sets.
- Once the manor is assembled and sturdy, pipe icing along seams for reinforcement and decorate with candies and chocolate accents.
- Allow the finished house to dry fully for several hours (or overnight) before displaying or gifting.
Enjoy your Chocolate-Gingerbread Manor — rich, chocolatey, and picture-perfect for winter celebrations!
Molasses-Orange Tudor
Warm, spiced molasses and bright orange make this Tudor-style gingerbread house cozy and classic.
Ingredients:
- 3/4 cup (180 g) unsalted butter, softened
- 1/2 cup (100 g) packed dark brown sugar
- 1/2 cup (160 g) unsulphured molasses
- 1 large egg
- Zest of 1 large orange
- 2 1/2 cups (310 g) all-purpose flour
- 1 1/2 tsp ground ginger
- 1 tsp ground cinnamon
- 1/2 tsp ground allspice
- 1/4 tsp ground cloves
- 1/2 tsp baking soda
- 1/4 tsp fine salt
How to Make:
- Cream the butter and brown sugar in a large bowl until light and fluffy.
- Beat in the molasses, egg, and orange zest until well combined.
- Whisk together the flour, ginger, cinnamon, allspice, cloves, baking soda, and salt in a separate bowl.
- Gradually stir the dry ingredients into the wet mixture until a firm dough forms.
- Divide the dough in half, flatten into discs, wrap in plastic, and chill for at least 1 hour.
- Preheat oven to 350°F (175°C). Line baking sheets with parchment.
- Roll chilled dough on a lightly floured surface to about 1/8-inch (3 mm) thickness.
- Cut house pieces with your templates (walls, roof, gables), transferring carefully to the prepared sheets.
- Bake 8–12 minutes, until edges are set and slightly darkened; don’t overbake.
- Cool pieces on the pan for 5 minutes, then transfer to a wire rack to cool completely.
- Assemble using royal icing or thick melted sugar as glue; allow joints to set firmly before decorating.
- Finish with candies, piped icing, and extra orange zest for a bright, festive touch.
Enjoy building a warm, citrusy Tudor that smells as good as it looks!
Chai-Spiced Victorian

Chai-Spiced Victorian — a warm, fragrant gingerbread house that tastes like a cup of spiced chai in cookie form.
Ingredients:
- 3 cups all-purpose flour
- 1 teaspoon baking soda
- 2 teaspoons ground ginger
- 1 teaspoon ground cinnamon
- 1/2 teaspoon ground cardamom
- 1/2 teaspoon ground cloves
- 1/4 teaspoon ground nutmeg
- 1/4 teaspoon ground black pepper (optional, for a warm bite)
- 1/2 teaspoon fine salt
- 3/4 cup (150 g) packed dark brown sugar
- 3/4 cup (170 g) unsalted butter, softened
- 1 large egg
- 1/2 cup molasses
- 1 teaspoon vanilla extract
- 1–2 tablespoons milk (if needed to adjust dough)
Royal Icing (for assembly and decoration):
- 3 cups powdered sugar, sifted
- 2 large egg whites or 4 tablespoons meringue powder + 4 tablespoons water
- 1/2 teaspoon vanilla extract
- Pinch of salt
How to Make:
- In a bowl whisk flour, baking soda, ginger, cinnamon, cardamom, cloves, nutmeg, pepper, and salt until well combined.
- In a separate large bowl cream the butter and brown sugar until light and fluffy, about 2–3 minutes.
- Beat in the egg, then stir in molasses and vanilla until smooth.
- Gradually add the dry mixture to the wet mixture and stir until a stiff dough forms; add 1–2 tablespoons milk only if the dough is too crumbly.
- Divide dough in half, flatten into disks, wrap in plastic, and chill for at least 1 hour (or overnight) until firm.
- Preheat oven to 350°F (175°C). Line baking sheets with parchment.
- Roll one disk of chilled dough between sheets of parchment to about 1/8–1/4 inch thick. Use your house templates to cut panels, roof pieces, and decorative shapes.
- Transfer pieces to prepared sheets and bake 10–14 minutes until edges are set and slightly darkened; thicker pieces may need a minute or two more.
- Let baked pieces cool on the sheet for 5 minutes, then transfer to a rack to cool completely — cooling fully helps pieces stay sturdy.
- Make royal icing: whisk egg whites (or reconstituted meringue powder), powdered sugar, vanilla, and salt until glossy and stiff peaks form; adjust thickness with a few drops of water for piping or thicker icing for glue.
- Assemble the house by piping thick icing along edges and pressing pieces together; support walls until set, then attach roof and let dry fully (several hours or overnight).
- Use thinner royal icing to pipe details and attach candies, spiced cookies, or dried ginger slices for Victorian charm.
- Let the assembled house dry thoroughly so decorations stay put.
Enjoy your Chai-Spiced Victorian — a cozy, spiced centerpiece that’s as delightful to look at as it’s to nibble.
Gluten-Free Alpine Lodge
Cozy Alpine charm — a sturdy, gluten-free gingerbread lodge perfect for snowy displays and sweet snowscaping.
Ingredients:
- 2 1/4 cups (300 g) gluten-free all-purpose flour blend (with xanthan gum)
- 1/2 cup (60 g) tapioca starch
- 1 tsp baking powder
- 1 tsp ground ginger
- 1 tsp ground cinnamon
- 1/4 tsp ground cloves
- 1/2 tsp kosher salt
- 1/2 cup (115 g) unsalted butter, softened
- 1/2 cup (100 g) packed brown sugar
- 1 large egg
- 1/2 cup (120 ml) unsulfured molasses
- 1 tsp vanilla extract
Royal Icing (for assembly and decoration):
- 3 cups (360 g) powdered sugar, sifted
- 2 large egg whites or 4 tbsp meringue powder + 6 tbsp water
- 1/2 tsp vanilla extract
- Pinch of salt
- Food coloring as desired (optional)
How to Make:
- Whisk together the gluten-free flour blend, tapioca starch, baking powder, ginger, cinnamon, cloves, and salt in a bowl.
- In a separate large bowl, cream the softened butter and brown sugar until light and fluffy, about 2–3 minutes.
- Beat in the egg, then stir in the molasses and vanilla until smooth.
- Gradually add the dry ingredients to the wet, mixing until a stiff dough forms. Chill the dough for 30–45 minutes, wrapped in plastic.
- Preheat the oven to 350°F (175°C). Line baking sheets with parchment.
- Roll the dough between two pieces of parchment to about 1/4-inch (6 mm) thickness; dust lightly with extra gluten-free flour if sticky.
- Cut pieces for an alpine lodge: front and back walls (with roofline), two side walls, two roof panels, and any chimney or porch pieces. Transfer carefully to the baking sheets.
- Bake 10–14 minutes, depending on thickness — edges should be set and slightly firm. Let cool on the sheet for 5 minutes, then transfer to a rack to cool completely.
- Meanwhile, make royal icing: beat the egg whites (or reconstituted meringue powder with water) until foamy, then gradually add sifted powdered sugar, vanilla, and salt. Beat to stiff peaks; divide and tint if desired.
- Use a piping bag with a medium tip to assemble the cooled pieces: pipe a thick line of icing along edges and hold pieces together until set. Support with cups or cans for 10–20 minutes, then let fully dry for several hours or overnight.
- Once sturdy, decorate the lodge with icing “snow,” roof shingles, candy icicles, and any alpine details you like.
- Allow decorations to set completely before moving. Enjoy displaying — and nibbling — your cozy gluten-free Alpine lodge!
Have fun building your snowy retreat and enjoy every gingered bite!
Vegan Snowy Bungalow
Vegan Snowy Bungalow — a cozy, cruelty-free gingerbread house dusted in snowy royal icing.
Ingredients:
- 3 cups all-purpose flour
- 1/2 cup brown sugar, packed
- 1/2 cup molasses (unsulphured)
- 1/3 cup coconut oil, melted (or vegan butter)
- 1/4 cup non-dairy milk (soy, almond, oat)
- 2 tsp ground ginger
- 1 tsp ground cinnamon
- 1/2 tsp ground cloves
- 1/2 tsp baking soda
- 1/2 tsp salt
- 1 tsp vanilla extract
- 2 cups powdered sugar (for icing)
- 3 tbsp aquafaba (chickpea liquid), whipped until foamy (for royal icing)
- 1/2 tsp cream of tartar (for icing)
- Assorted vegan candies and sprinkles for decorating
- Extra powdered sugar for dusting
How to Make:
- Preheat oven to 350°F (175°C) and line baking sheets with parchment.
- In a bowl, whisk flour, ginger, cinnamon, cloves, baking soda, and salt.
- In another bowl, mix brown sugar, molasses, melted coconut oil, non-dairy milk, and vanilla until smooth.
- Stir dry ingredients into wet until a firm dough forms; if too sticky, add a tablespoon of flour at a time.
- Divide dough in half, flatten into discs, wrap, and chill 30 minutes.
- Roll one disc between parchment to 1/8-inch thickness and cut out house pieces using templates (walls, roof, door, windows).
- Transfer pieces to baking sheet and bake 10–12 minutes until edges are set; cool completely on a rack.
- Meanwhile, make vegan royal icing: whip aquafaba until foamy, add cream of tartar, then slowly beat in powdered sugar until stiff peaks form.
- Use thicker icing (less aquafaba) to glue pieces: pipe a line of icing along wall edges and press pieces together; hold or support until set.
- Attach roof pieces with generous icing and let structure dry 30–60 minutes before decorating.
- Decorate with icing, vegan candies, and sprinkles; dust with extra powdered sugar for a snowy effect.
- Let the finished bungalow set fully (several hours) so the icing hardens before displaying or gifting.
Enjoy your sweet, snowy vegan bungalow — perfect for sharing (or sneaking a cookie or two)!
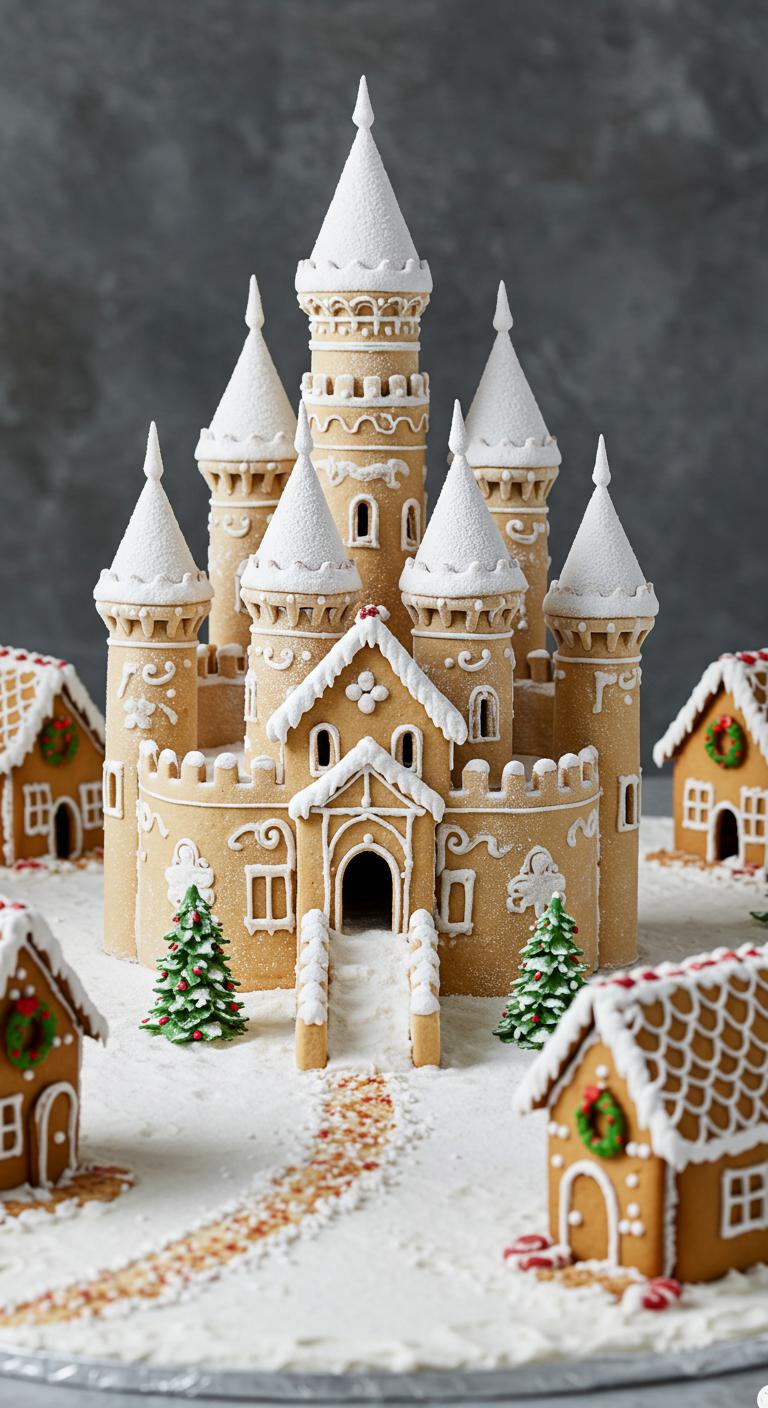
Miniature Cookie-Cutter Village
Sure — please provide the recipe name and the details (ingredients, quantities, any special instructions or notes) for the “Miniature Cookie-Cutter Village” and I’ll format the full recipe as requested.

Nordic Star Roof Retreat
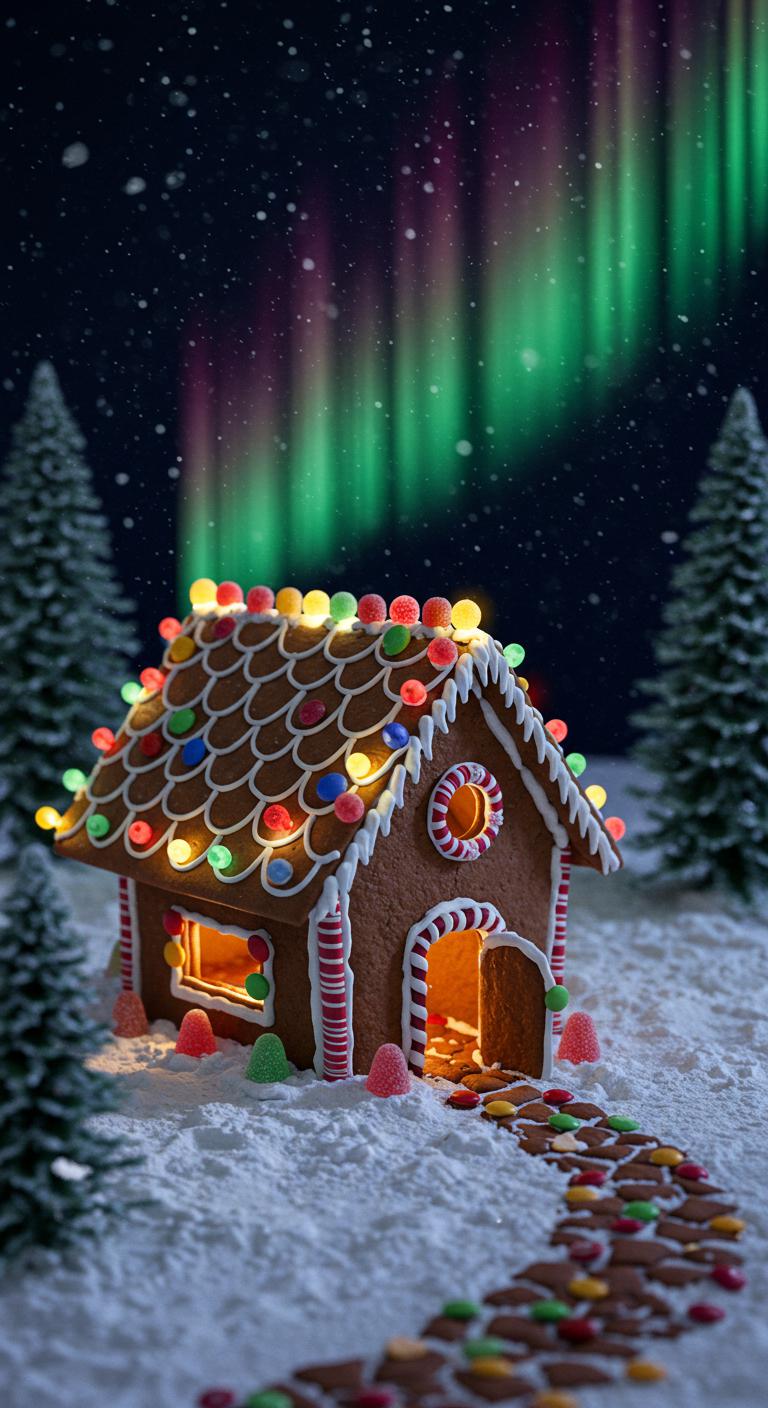
Nordic Star Roof Retreat — a cozy, wintry gingerbread roof that twinkles like the northern lights.
Ingredients:
- 3 cups all-purpose flour
- 1 tsp ground ginger
- 1 tsp ground cinnamon
- 1/4 tsp ground cloves
- 1/2 tsp salt
- 3/4 cup (1 1/2 sticks) unsalted butter, softened
- 3/4 cup brown sugar, packed
- 1 large egg
- 1/2 cup unsulphured molasses
- 1 tsp vanilla extract
- Royal icing for assembly and decoration (about 3 cups)
- Assorted candies and edible glitter for decorating
How to Make:
- In a bowl, whisk together flour, ginger, cinnamon, cloves, and salt.
- In a separate large bowl, cream the softened butter and brown sugar until light.
- Beat in the egg, molasses, and vanilla until smooth.
- Gradually add the dry ingredients to the wet, mixing until a firm dough forms.
- Divide dough in half, flatten into disks, wrap, and chill at least 1 hour.
- Preheat oven to 350°F (175°C) and line baking sheets with parchment.
- Roll one disk on a floured surface to about 1/8-inch thickness.
- Cut roof panels using a Nordic star roof template or create long triangular panels to form a peaked roof.
- Transfer pieces to the baking sheet and bake 8–12 minutes until edges are set; cool completely on a wire rack.
- Prepare royal icing to a thick consistency for assembly.
- Pipe icing along panel edges and join pieces to form the star-shaped roof; hold or support until set.
- Once sturdy, decorate with icing, candies, and edible glitter to mimic snowy stars.
- Let the roof dry fully before placing atop your gingerbread house.
Enjoy your Nordic Star Roof Retreat — a sparkly, cozy topper that brings holiday magic to any gingerbread house.
Peppermint Bark Barn
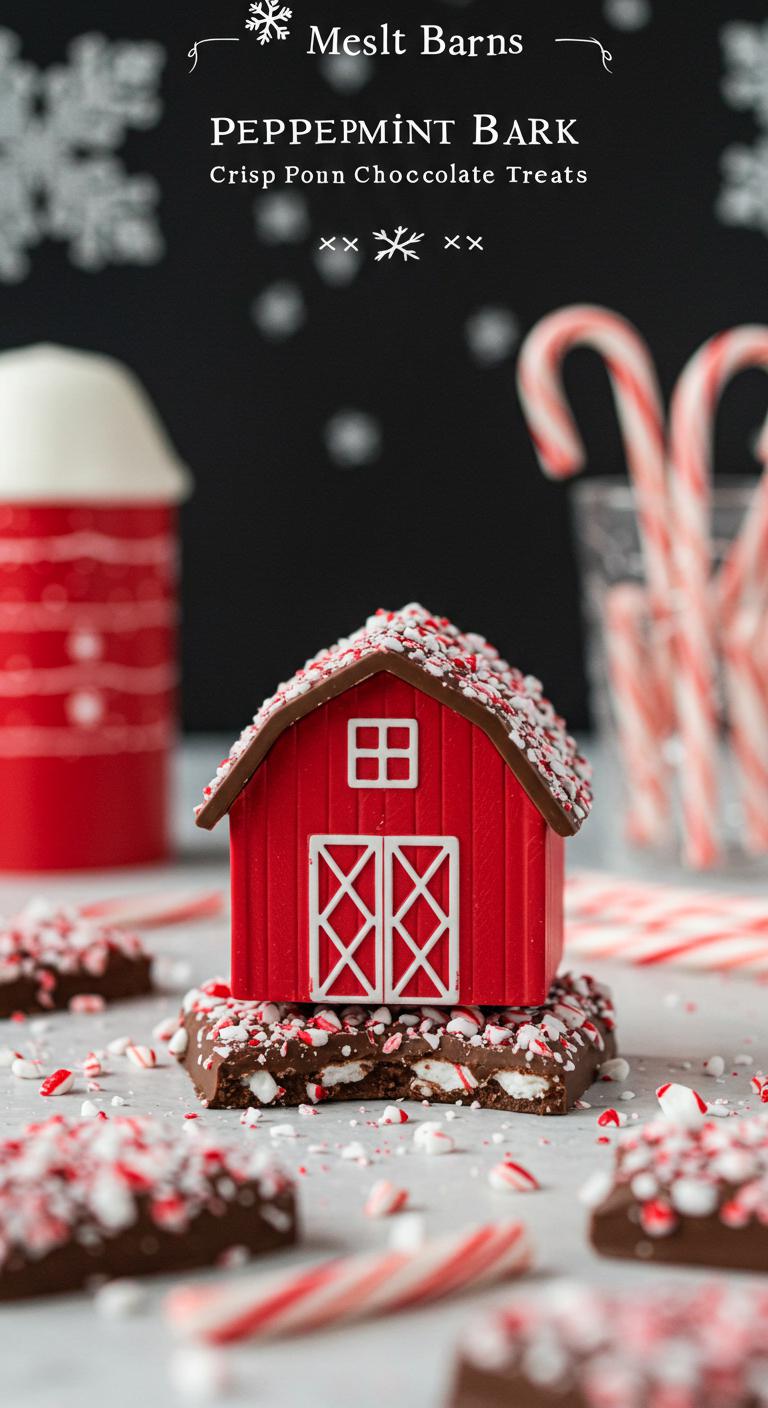
Peppermint Bark Barn — a crisp, minty chocolate treat shaped like a tiny barn with crunchy candy cane topping.
Ingredients:
- 12 oz dark chocolate (or semisweet), chopped
- 12 oz white chocolate, chopped
- 1 tsp peppermint extract
- 3/4 cup crushed candy canes or peppermints (about 6–8 candy canes)
- 1 tsp coconut oil or neutral oil (optional, for gloss)
- Parchment paper
- Small rectangular mold or a lined baking sheet and cardboard barn cutouts (for shaping)
How to Make:
- Line a baking sheet or mold with parchment paper and set aside.
- Melt the dark chocolate: place chopped dark chocolate and 1/2 tsp peppermint extract in a heatproof bowl over a simmering pot of water (double boiler) or microwave in 20–30 second bursts, stirring until smooth. Stir in a little oil if you want extra shine.
- Pour the dark chocolate into the prepared mold or onto the lined sheet and spread into a barn-shaped rectangle about 1/4–1/2 inch thick. Smooth the surface.
- Chill the dark chocolate in the fridge for 10–15 minutes until set but still slightly tacky.
- Melt the white chocolate the same way, adding the remaining 1/2 tsp peppermint extract and stirring until smooth.
- Pour or drizzle the white chocolate over the chilled dark chocolate, spreading to cover and creating a marbled or swirled look if you like.
- Immediately sprinkle the crushed candy canes evenly over the warm white chocolate so they stick.
- Press gently so the pieces adhere, then return to the fridge for 20–30 minutes until fully set.
- Remove from the mold or peel off the parchment. If using a large sheet, cut into barn-shaped pieces or use small cardboard barn cutouts as guides to break into shapes.
- Store in an airtight container in a cool place or the fridge until serving.
Enjoy your festive Peppermint Bark Barn — crunchy, minty, and impossible to resist!
Salted-Caramel Gingerbread Cottage
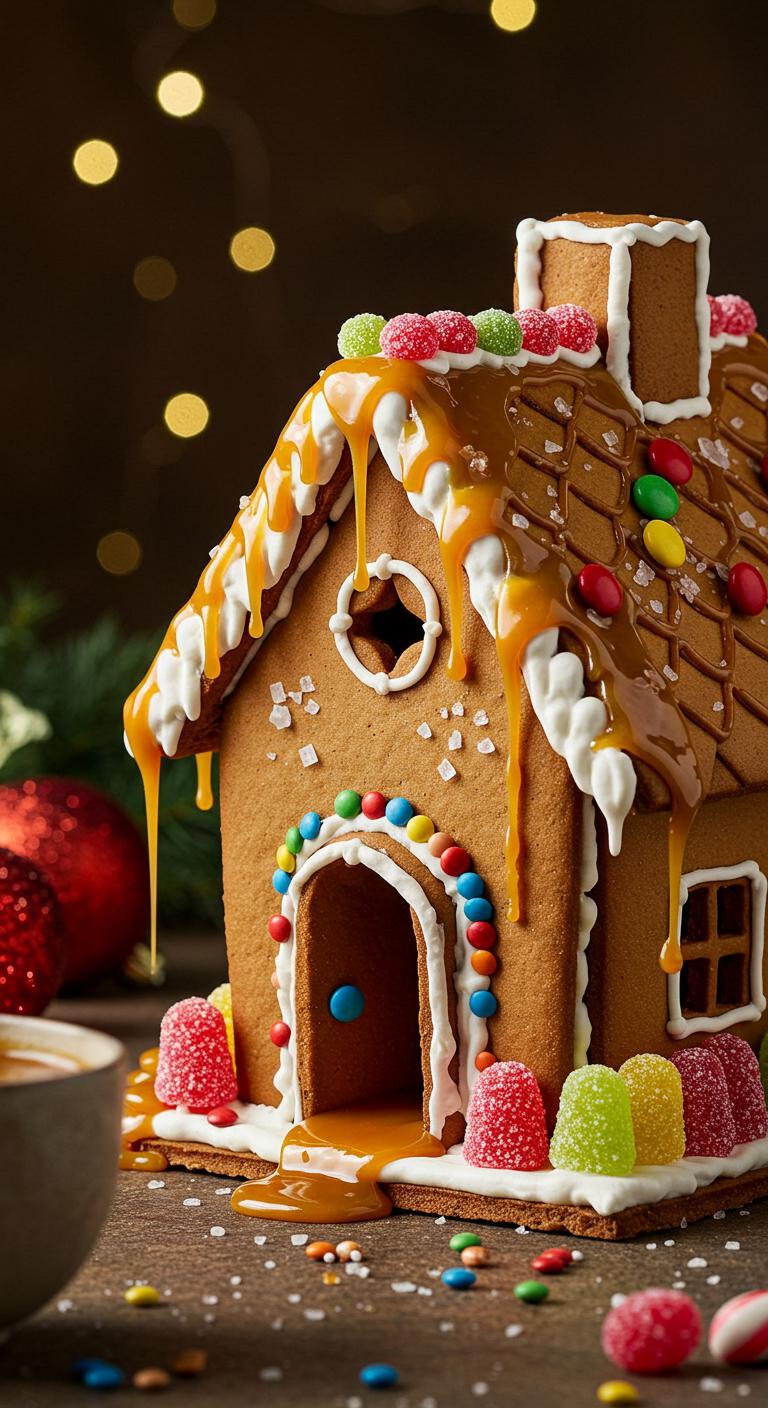
Sweet, buttery gingerbread meets gooey salted caramel in a cozy cottage you can eat.
Ingredients:
- 3 cups (360 g) all-purpose flour
- 1 1/2 tsp ground ginger
- 1 tsp ground cinnamon
- 1/2 tsp ground cloves
- 1/2 tsp baking soda
- 1/2 tsp fine sea salt
- 1/2 tsp finely ground black pepper (optional, for depth)
- 3/4 cup (170 g) unsalted butter, softened
- 3/4 cup (150 g) packed brown sugar
- 1 large egg
- 1/2 cup (120 ml) unsulphured molasses
- 1 tsp vanilla extract
- 1/4 cup (60 ml) milk, plus extra if needed
For the salted-caramel filling and decoration:
- 1 cup (200 g) granulated sugar
- 6 tbsp (90 g) unsalted butter, cut into pieces
- 1/2 cup (120 ml) heavy cream, warm
- 1 tsp flaky sea salt (plus extra to finish)
- Royal icing for assembly (store-bought or homemade)
- Assorted candies, sprinkles, and edible decorations for the cottage
How to Make:
- Whisk flour, ginger, cinnamon, cloves, baking soda, and salt (and pepper if using) in a bowl; set aside.
- Beat softened butter and brown sugar until light and fluffy, about 2–3 minutes.
- Add egg, molasses, and vanilla to the butter mixture and beat until combined.
- Gradually stir the dry ingredients into the wet, add milk to bring dough together; chill 1–2 hours until firm.
- Preheat oven to 350°F (175°C). Roll dough between parchment to about 1/8–1/4 inch thick.
- Cut cottage pieces using templates (walls, roof, chimney) and transfer to parchment-lined baking sheets.
- Bake 8–12 minutes until edges are set; cool completely on wire racks.
- Meanwhile make the salted caramel: heat sugar in a dry saucepan over medium, swirling until melted and amber.
- Carefully add butter and stir until melted, then slowly pour in warm cream while whisking; simmer 1–2 minutes.
- Remove from heat and stir in flaky sea salt; let caramel cool until thick but still pourable.
- Use royal icing to assemble walls and roof, holding pieces until set; reinforce seams with extra icing.
- Spoon or pipe cooled salted caramel inside the cottage as a gooey filling or drip it along roof edges for effect.
- Decorate with candies and a sprinkle of flaky sea salt on the caramel for contrast.
- Let icing and caramel set fully before moving the cottage, about 1–2 hours.
Enjoy biting into your cozy salted-caramel gingerbread cottage—sweet, salty, and totally irresistible!
Lemon-Ginger Beach House

Bright, zesty seaside charm — a Lemon-Ginger Beach House that smells like ocean breezes and fresh citrus.
Ingredients:
- 2 1/2 cups all-purpose flour
- 1/2 cup powdered sugar
- 1 tsp ground ginger
- 1/2 tsp ground cinnamon
- 1/4 tsp salt
- 1/2 cup (1 stick) cold unsalted butter, cubed
- 1 large egg yolk
- 2–3 tbsp cold water
- Zest of 1 lemon
- 1 tbsp lemon juice
- 1/4 cup crystallized ginger, finely chopped
- Royal icing for assembly and decoration (about 2 cups prepared)
- Yellow and white food coloring (optional)
- Assorted candies, shredded coconut, and mini umbrella picks for beachy decoration
- Granulated sugar or sanding sugar for sparkle
How to Make:
- Preheat oven to 350°F (175°C) and line baking sheets with parchment.
- Whisk flour, powdered sugar, ground ginger, cinnamon, and salt in a bowl.
- Cut cold butter into the flour mixture until it resembles coarse crumbs.
- Stir in lemon zest, chopped crystallized ginger, egg yolk, lemon juice, and 2 tbsp cold water; add the extra tbsp only if dough is dry.
- Gather dough into a disk, wrap, and chill 20–30 minutes until firm.
- Roll dough on a lightly floured surface to about 1/8-inch thickness.
- Cut house panels and roof pieces (walls, roof, door, windows, and any decorative shapes).
- Transfer pieces to prepared sheets and bake 10–12 minutes or until edges are lightly golden; cool completely.
- Tint royal icing yellow for beach-house color and keep white icing for trim; pipe reinforcement lines on edges and let set slightly.
- Assemble walls with royal icing, hold until set, then attach roof pieces and let fully harden (about 30–60 minutes).
- Decorate with white trim, sugar for sand, shredded coconut for beach, small candies for lifebuoys, and mini umbrellas for a beachy vibe.
- Add final details like window panes, sun rays with yellow icing, and a sprinkle of sanding sugar for sparkle.
Enjoy your bright, gingery lemon beach house — perfect for sunny displays and tasty seaside daydreams!
Retro 1950s Diner Gingerbread

Retro 1950s Diner Gingerbread
A sweet, spiced gingerbread house that looks like a classic 1950s diner—complete with checkered tiles, a neon-sign feel, and plenty of candy chrome.
Ingredients:
- 3 cups all-purpose flour
- 1 tsp baking soda
- 1 tbsp ground ginger
- 2 tsp ground cinnamon
- 1/2 tsp ground cloves
- 1/2 tsp freshly grated nutmeg (or 1/4 tsp ground)
- 1/2 tsp salt
- 3/4 cup (1.5 sticks) unsalted butter, softened
- 3/4 cup dark brown sugar, packed
- 1 large egg
- 1/2 cup molasses (unsulphured)
- 1 tsp vanilla extract
- Royal icing for assembly and decoration (about 4 cups prepared)
- Assorted candies for diner decor: red and white peppermints, mini chocolate chips, gumdrops, licorice laces, silver dragées (for a chrome look), red hot candies for neon accents
- Edible gel or piping colors: red, black, aqua/teal (for diner sign and checkered floor)
How to Make:
- In a bowl, whisk flour, baking soda, ginger, cinnamon, cloves, nutmeg, and salt until evenly combined.
- In a larger bowl, beat the softened butter and brown sugar until light and fluffy, about 2–3 minutes.
- Beat in the egg, then stir in molasses and vanilla until smooth.
- Gradually add the dry ingredients to the wet, mixing until a firm dough forms. Don’t overmix.
- Divide dough in half, flatten each into a disk, wrap in plastic, and chill at least 1 hour (or overnight).
- Preheat oven to 350°F (175°C). Line baking sheets with parchment.
- Roll chilled dough between parchment to 1/4-inch thickness. Cut out house panels (front, back, two sides, two roof pieces) and any diner-specific shapes like a rectangular sign or awning.
- Transfer pieces to prepared sheets and bake 10–14 minutes, until edges are set but not dark. Cool completely on wire racks.
- Prepare royal icing to a thick, pipeable consistency for assembling (thick) and a slightly thinner consistency for detailing.
- Use thick royal icing to glue walls together: pipe a generous bead along edges, hold pieces in place until set, and let the assembled shell dry 30–60 minutes before adding the roof.
- Attach roof pieces with thick icing and support them until set. Let the whole structure dry at least 2 hours for stability.
- Apply a base layer of icing where you want the checkered floor. Pipe alternating black and white squares (or black and aqua) for a 1950s diner look.
- Decorate the roof edge with silver dragées for chrome trim and use licorice laces to create a booth outline or awning stripes.
- Pipe a retro neon-style diner sign using red and aqua gels or colored icing; outline with black piping for contrast and add “DINER” with white icing or small candies.
- Add candies for finishing touches: red hots for neon bulbs, mini chocolate chips for jukebox dots, peppermints for windows, and gumdrops for rooftop accents.
- Let all icing decorations fully dry (several hours or overnight) before moving or displaying to avoid smudging.
Enjoy your little slice of 1950s nostalgia—sweet, sparkly, and ready for a malt on the side!
Rustic Woodland Cabin With Pretzel Logs
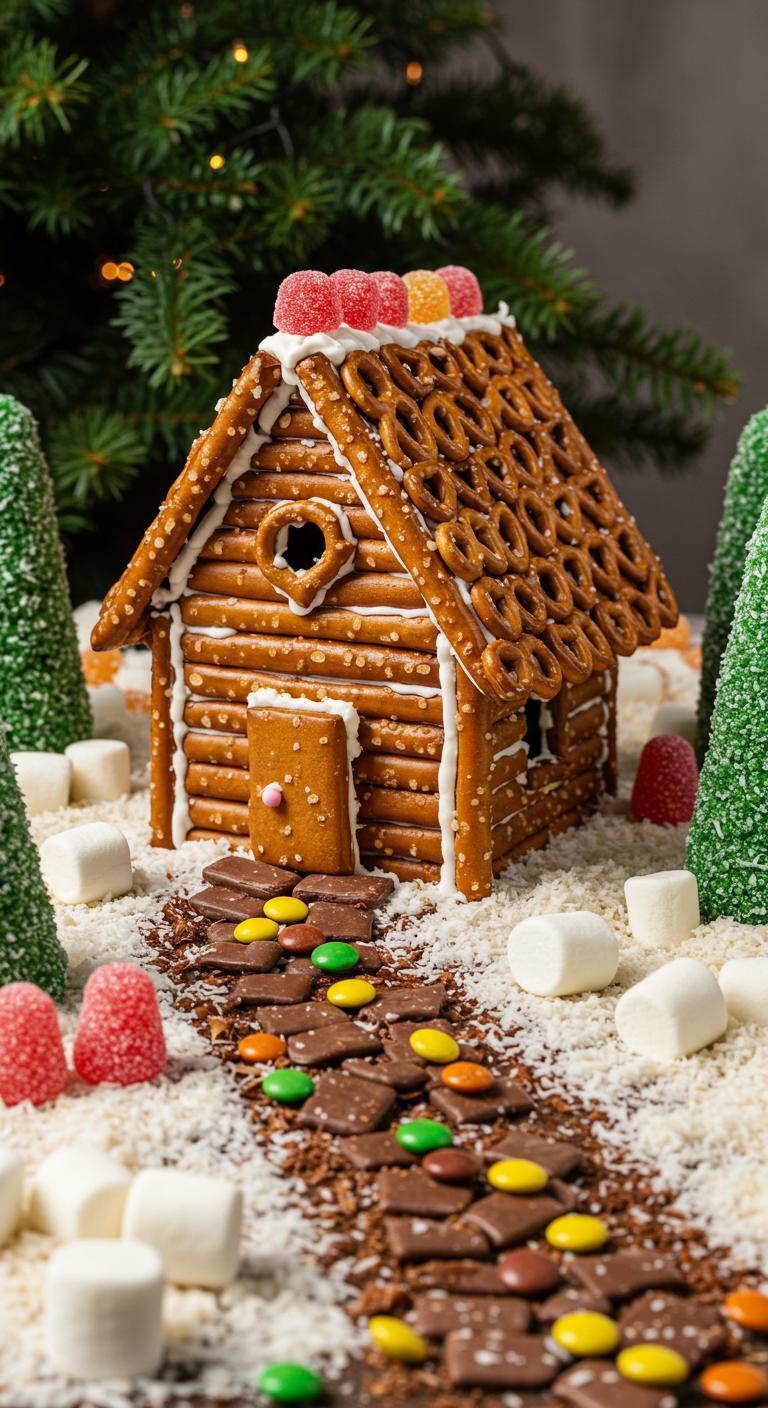
A cozy, cabin-style gingerbread house with salty pretzel log accents — rustic, crunchy, and full of woodland charm.
Ingredients:
- Gingerbread dough (for house panels; enough for walls, roof, and door—see your favorite sturdy recipe)
- Royal icing (thick for assembly; extra for decoration)
- Mini pretzel rods (for log walls; about 40–60 depending on size)
- Pretzel twists or sticks (for fences and accents)
- Chocolate candy bark or chocolate squares (melted, for “stone” foundation)
- Shredded coconut (toasted, for “snow” or forest floor)
- Mini marshmallows (for snow mounds)
- Assorted candies (peppermints, gumdrops, chocolate buttons for decorating)
- Edible moss or green-tinted coconut (or green sugar) for foliage
- Small cookies or wafer pieces (for wood shutters, steps)
- Food coloring (optional, for icing)
- Piping bags and tips (or zip-top bags with a corner snipped)
How to Make:
- Bake gingerbread panels and allow them to cool completely so they stay firm while assembling.
- Prepare thick royal icing and load into piping bags—reserve one bag slightly thinner for surface decoration.
- Pipe a strong bead of icing along the edges of the base wall pieces and attach the walls together on your board; hold briefly until set.
- Reinforce inside seams with extra icing and let the walls stabilize for 10–20 minutes.
- Attach the roof panels with a generous bead of icing along the top edges and prop them in place until the icing sets.
- Use melted chocolate to create a “stone” foundation at the base of the cabin; press cookie crumbs or small candy pieces into the chocolate while it’s soft.
- Break mini pretzel rods to size and attach them horizontally to the exterior walls with royal icing, overlapping slightly to mimic log layers; work in rows from bottom to top.
- Add pretzel stick accents for porch posts, railings, or a stacked woodpile at the side of the cabin.
- Pipe icing details for window frames and door; attach wafer pieces or small cookies for shutters and steps.
- Sprinkle toasted coconut around the base for woodland “snow” and tuck mini marshmallows into little snowdrifts.
- Add green-tinted coconut or edible moss around the foundation and in little clumps for foliage; press candies into place for extra color.
- Finish with icing “icicles” along the eaves, a candy chimney or gumdrop rooftop, and any additional decorative touches you like.
- Let the whole cabin dry for several hours or overnight so everything sets firm before moving.
Enjoy your rustic woodland cabin — a crunchy, salty-sweet centerpiece perfect for holiday displays and snacking!
Elegant Royal Icing Palace
A delicate, snowy royal icing palace that hardens to glossy perfection — ideal for piping elegant details on gingerbread houses.
Ingredients:
- 4 large egg whites (or 10–12 tablespoons pasteurized egg white powder reconstituted)
- 1 pound (about 4 cups) confectioners’ (icing) sugar, sifted
- 1/2 teaspoon cream of tartar
- 1 teaspoon vanilla extract (or almond extract for a different flavor)
- 1–2 teaspoons warm water, as needed for consistency
- Gel food coloring (optional, small amounts)
How to Make:
- In a clean, grease-free mixing bowl, beat the egg whites until frothy.
- Add the cream of tartar and continue to beat on medium speed.
- Gradually add the sifted confectioners’ sugar, about 1 cup at a time, beating well after each addition.
- Add the vanilla extract and beat on high until the icing forms stiff, glossy peaks (about 5–8 minutes).
- If the icing is too thick for piping, add warm water a few drops at a time until you reach desired consistency; for outlining use stiffer icing, for flooding use slightly thinner.
- Divide and tint small portions with gel food coloring if desired, stirring gently to keep the icing glossy.
- Transfer icing to piping bags fitted with fine tips for detail work and wider tips or squeeze bottles for filling larger areas.
- Pipe outlines and allow them to set (5–15 minutes) before flooding interior spaces; work in sections so edges firm up and support structure.
- Let finished decorations dry completely at room temperature for several hours or overnight until rock-hard.
- Store any unused icing in an airtight container in the refrigerator for up to 3 days — stir or re-whip lightly before using.
May your palace glisten and hold every delicate detail perfectly!
Conclusion
You’ve got 15 gingerbread house ideas to try, so pick one and get baking. Note that seasonal candy sales rise about 40% in December, so stock up early. Start by making sturdy dough, cut pieces accurately, and bake until firm. Use royal icing as glue and let joints dry fully before decorating. Work on a flat surface, keep candies within reach, and have fun testing small design changes as you go.