
You love the idea of olive-studded sourdough, but every loaf ends up with one half full of olives and the other nearly bare. You’re not alone — uneven olive distribution is the most common snag when adding inclusions. This guide shows you exactly how to add olives to sourdough evenly throughout so every slice has flavor and texture.
Read on and you’ll learn what to prep, how to prepare and fold olives into dough, step-by-step techniques for even distribution, and simple troubleshooting. You’ll get quick timings, quantities, and pin-worthy photos to follow.
What You’ll Need (Ingredients + Tools)
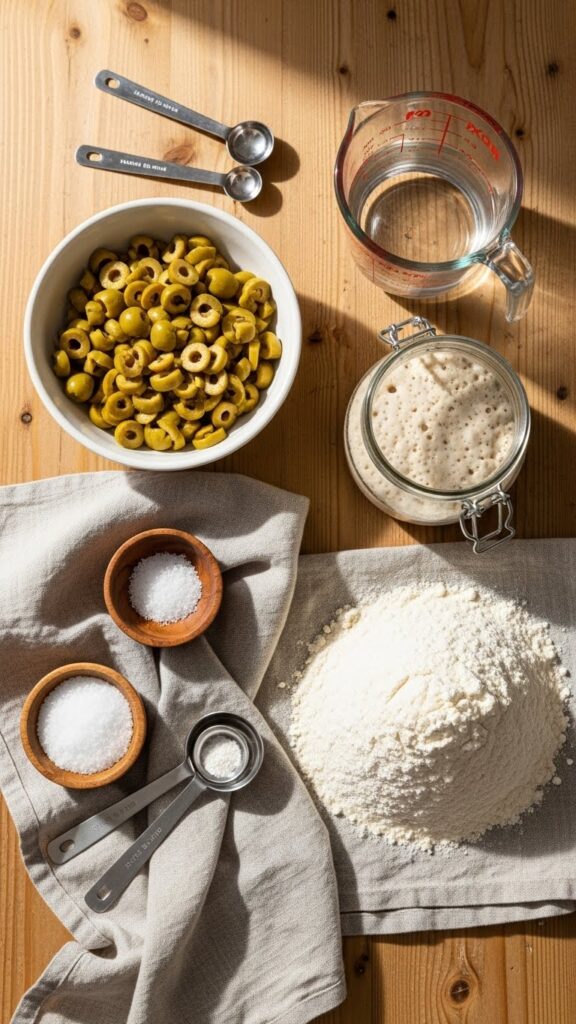
- Ingredients:
- 500 g bread flour
- 350 g water (70% hydration)
- 100–150 g active sourdough starter (fed)
- 10 g fine sea salt
- 200–220 g pitted olives, roughly chopped and drained
- Tools:
- Large mixing bowl, bench scraper, digital scale
- Proofing basket (banneton) or bowl lined with linen
- Sharp knife or kitchen scissors for chopping olives
- Clean towel or plastic wrap
Tip: Use brined green or Kalamata olives depending on the flavor you want. Rinse if very salty, then pat dry to avoid adding excess liquid.
Preparing Your Olives and Dough
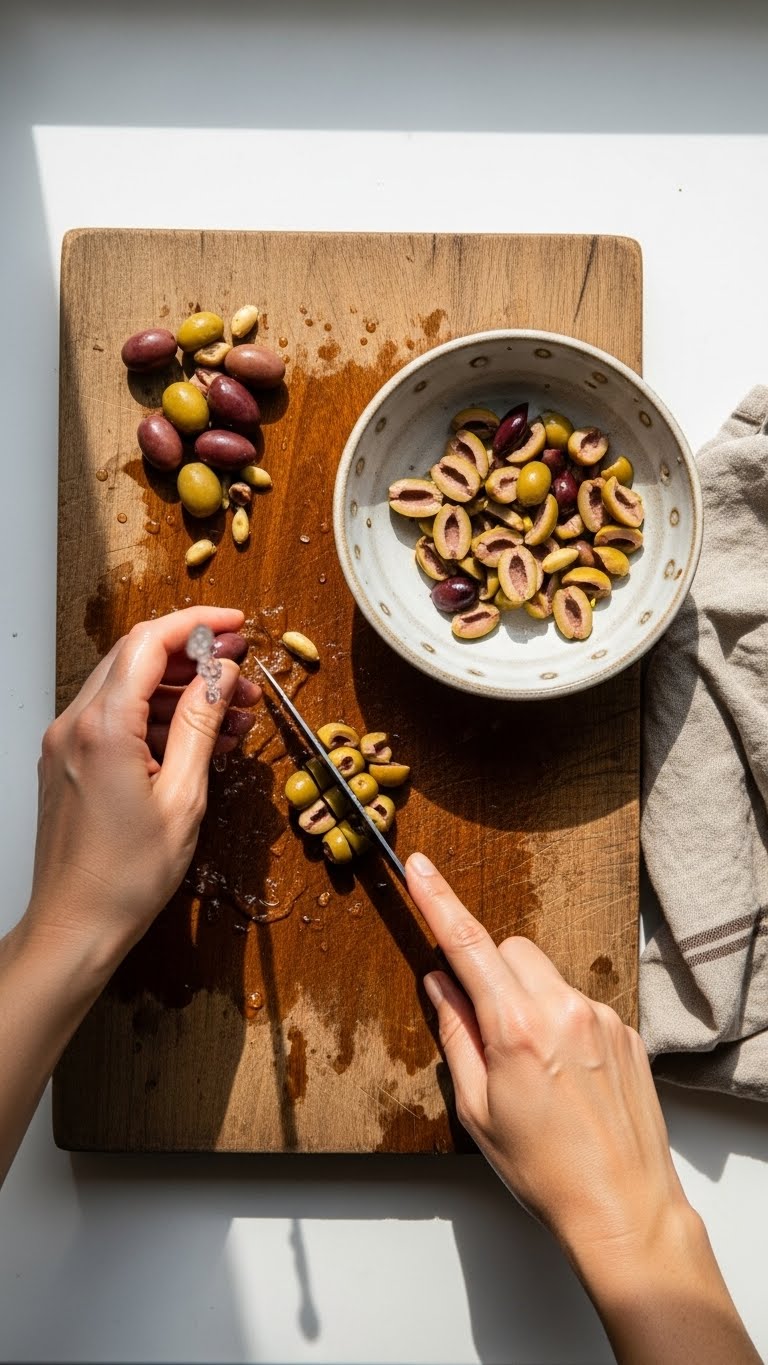
Prep olives before mixing:
- Rinse and pat dry if olives are very salty or wet.
- Chop roughly — aim for 1/2–1 cm pieces so they distribute easily without tearing the dough.
- Toss chopped olives in 1–2 teaspoons of flour to absorb surface oil. This helps them stick into the dough.
Make the dough:
- Combine 500 g flour and 350 g water; mix until no dry flour remains. Autolyse 30–45 minutes.
- Add 100–150 g starter and 10 g salt. Mix until cohesive and tacky.
Why this helps: an autolyse gives the dough structure so olives won’t slump to the bottom. Dusting olives with flour prevents clumping and sliding.
How to Add Olives to Sourdough Evenly Throughout (Technique Step-by-Step)
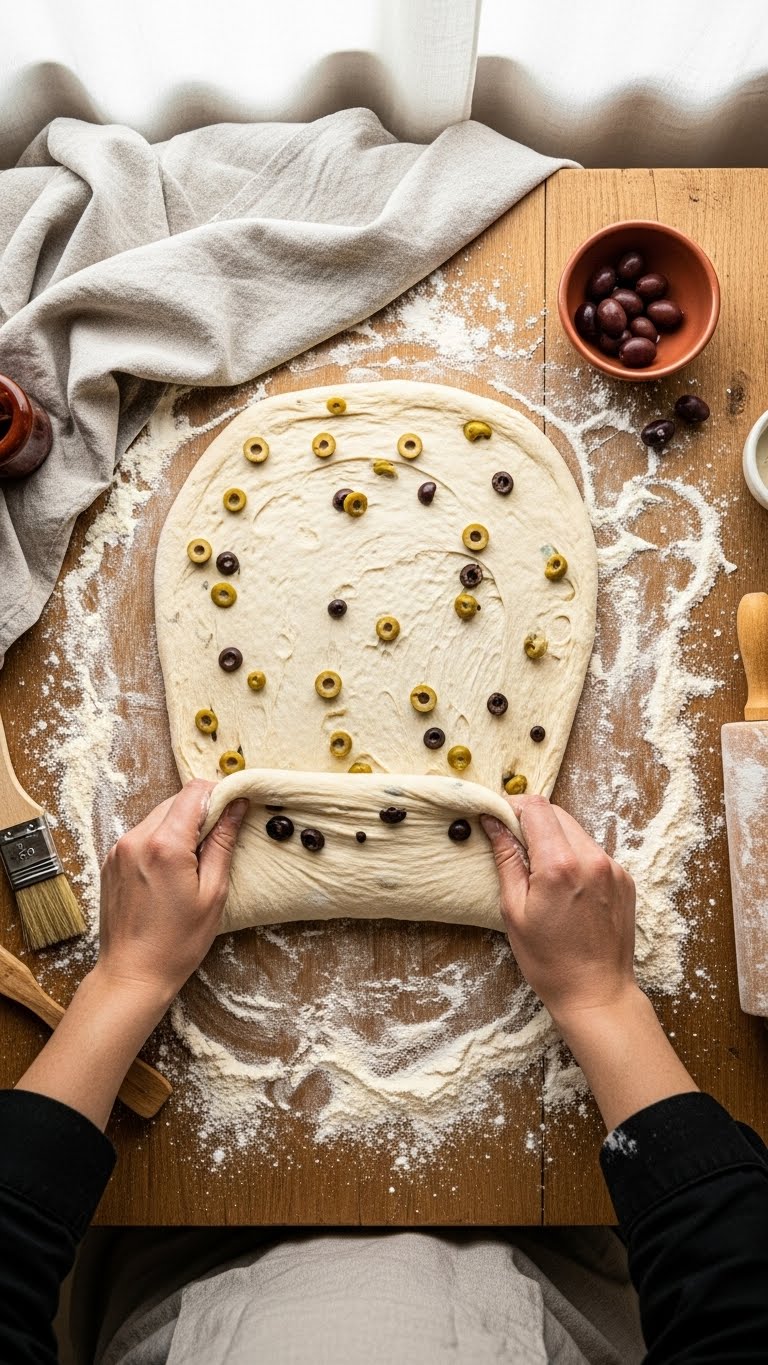
This is the core technique for how to add olives to sourdough evenly throughout:
- After the first set of stretch-and-folds (about 30–60 minutes into bulk fermentation), flatten dough gently on a lightly floured surface.
- Sprinkle olives over the dough evenly, leaving a small border.
- Fold dough over olives like an envelope to trap them inside.
- Perform 4–6 gentle stretch-and-folds, turning the dough 90° each time. This stretches olives into the matrix without smashing them.
- If you still see concentrated clusters, divide dough into two portions, distribute olives between portions, then re-shape and join gently.
Pro tips:
- Work with slightly tacky (not wet) dough — too wet and olives sink; too dry and they won’t incorporate.
- Use short, delicate folds to spread olives instead of vigorous mixing.
- For large olives, halve them; for small ones, use whole or quartered.
Proofing, Baking, and Storage
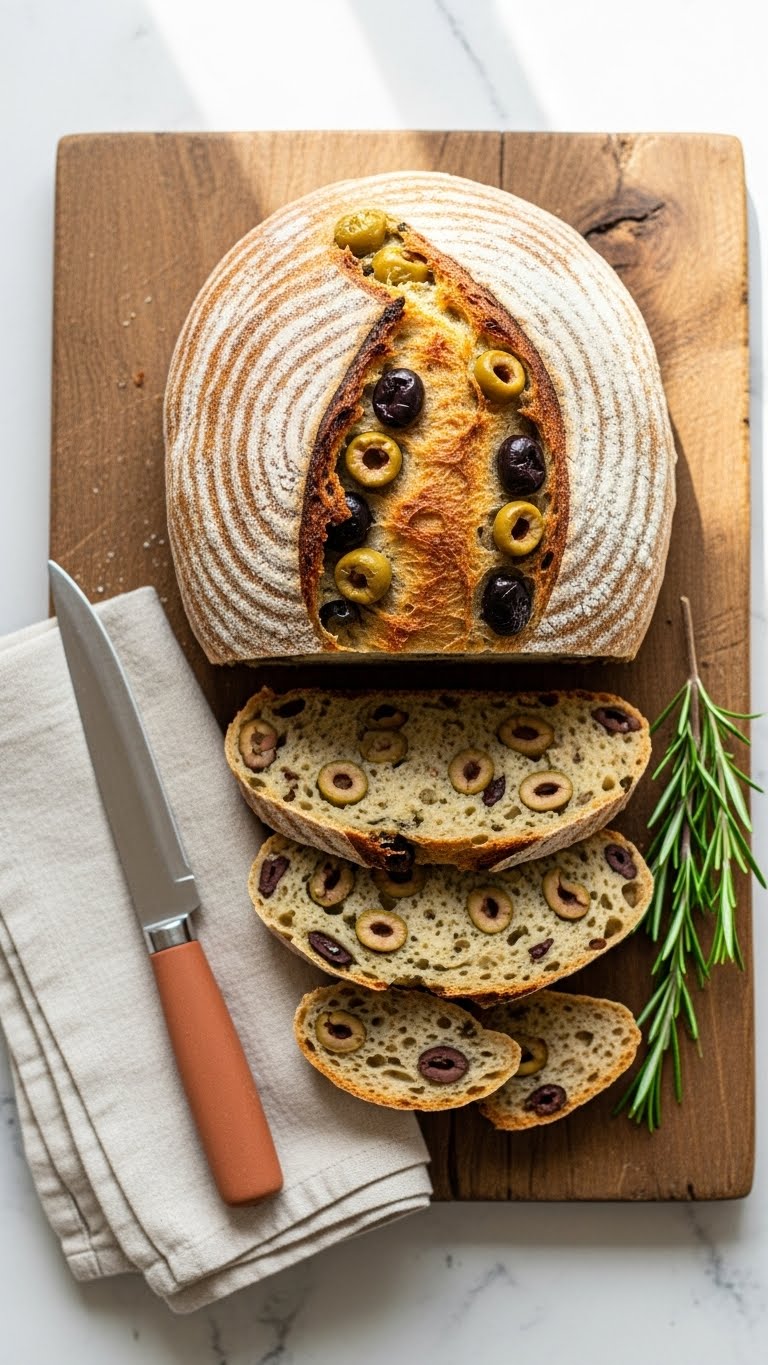
- Final proof: Shape gently and proof seam-side up in a banneton for 2–4 hours at room temp or overnight in fridge (8–12 hours).
- Score and bake: Preheat Dutch oven to 250°C / 480°F. Bake covered 20 minutes, then uncover and reduce to 230°C / 450°F for 20–25 minutes until crust is deep golden.
- Cooling and storage: Cool at least 2 hours before slicing so crumb sets. Store in linen bag for 2–3 days or slice and freeze for longer.
Troubleshooting:
- Olives clump: Dust more flour on olives, fold gently, or split dough.
- Olives sink to bottom: Dough may be too slack; tighten shaping and shorten wet stages.
- Excess brine: Rinse olives and pat dry before adding.
Make-ahead shortcut: Add olives during the final shaping instead of early bulk if you want less risk of spreading them too thinly — this gives a marbled effect rather than full-even distribution.
Enjoy the aroma and the balanced olive bites in every slice — that’s what even distribution looks like.
Finish your next loaf with confidence: pick one technique here to try tonight and pin this guide for reference. Which tip will you try first? Pin this guide for your next baking day and share with friends who bake!