
You’ve mixed your levain and flour, but the dough feels weak and floppy. Stretch and folds are the simple, tactile trick that builds strength and structure without heavy kneading. In this guide you’ll learn how to do stretch and folds for stronger sourdough dough so your loaf holds shape, gets better oven spring, and develops more open crumb.
You’ll get clear timings, a step-by-step method, and quick fixes you can try right away. Read on and you'll feel more confident handling wet dough and watching texture change under your hands.
What You'll Need for Stretch and Folds for Stronger Sourdough Dough
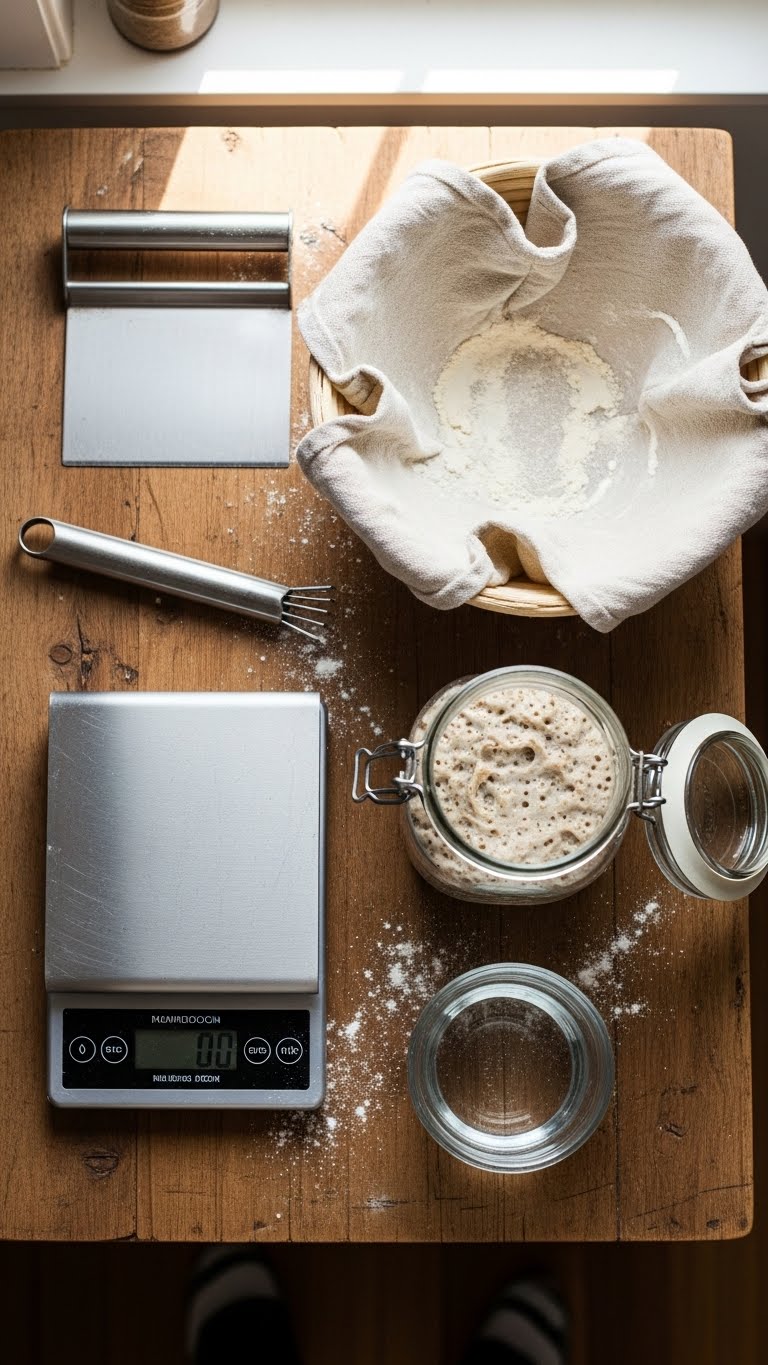
- Basic tools: bench scraper, glass or plastic bowl, damp kitchen towel, dough scraper.
- Example dough (for 1 loaf): 500 g bread flour, 375 g water (75% hydration), 100 g active starter, 10 g salt.
- Time: plan 2–3 hours of bulk fermentation with stretch and folds every 30 minutes; then final proofing.
- Tip: wet your hands or bowl edge to prevent sticking. Keep a damp towel over the dough between sets.
Getting Started: How to Prepare Your Sourdough for Stretch and Folds
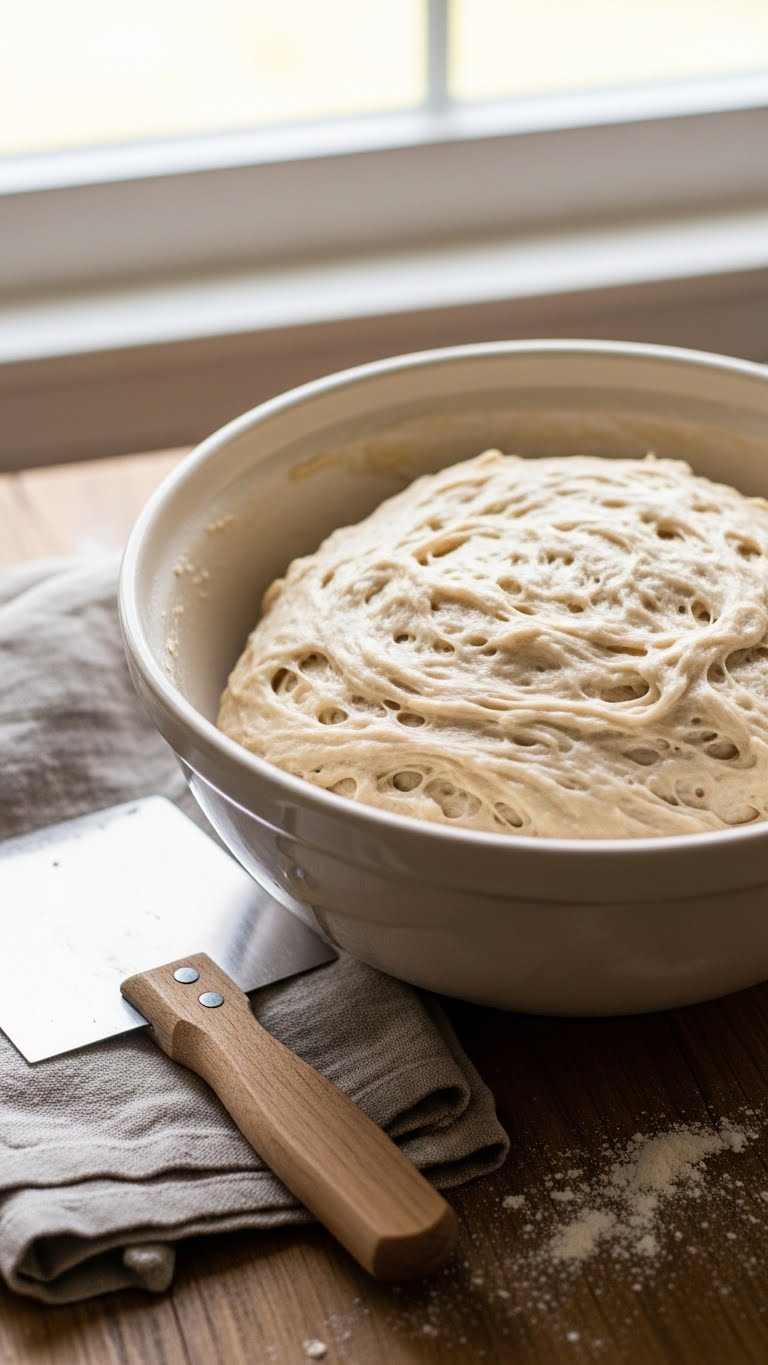
After autolyse and mixing in salt, your dough should be shaggy and slightly sticky. Let it rest 20–30 minutes before the first stretch and fold. This rest allows gluten to begin forming. Place the dough in a lightly oiled bowl to keep it from sticking to the sides.
If your dough feels very slack, do a gentle coil fold as a first move. If it's stiff, add a short extra rest of 10–15 minutes so the gluten relaxes.
The Stretch and Fold Technique: Step-by-Step Instructions
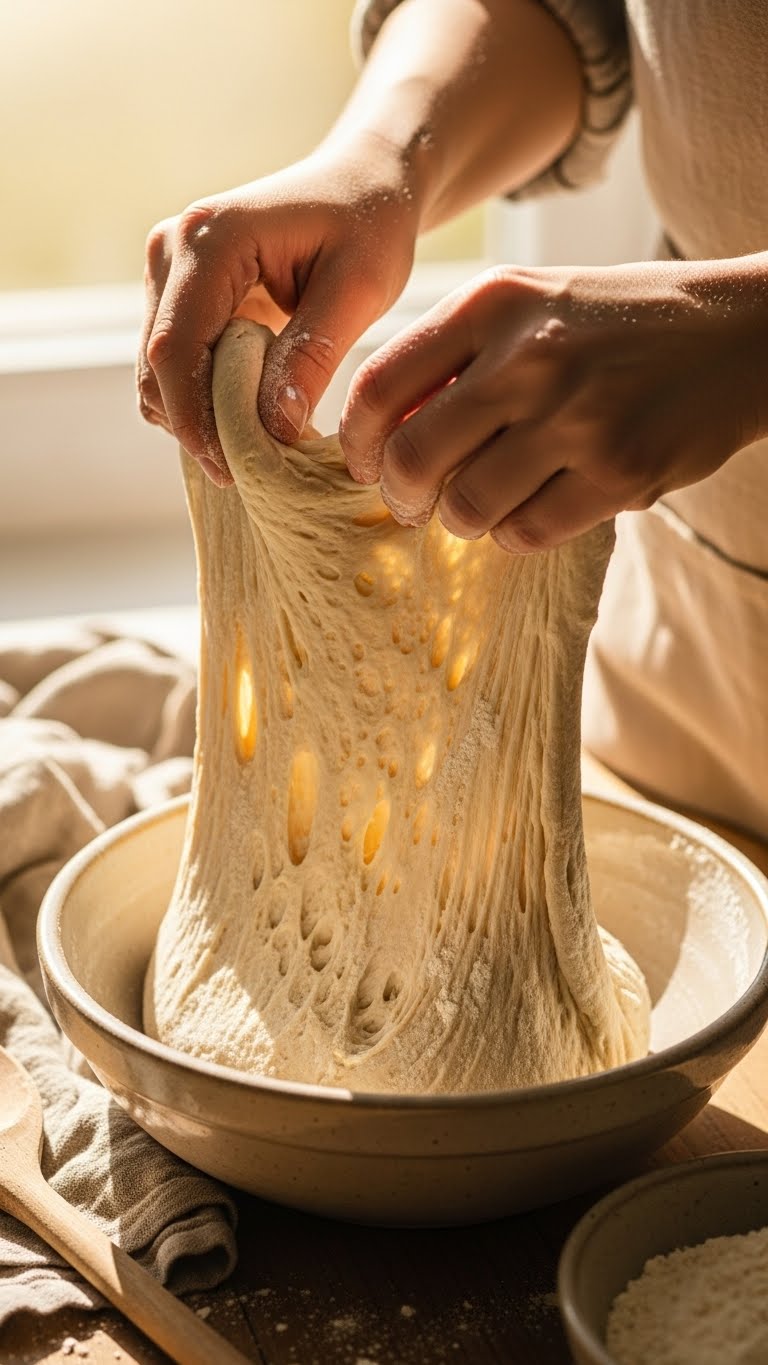
- Wet your fingertips or oil them lightly to stop sticking.
- With one hand, reach under one side of the dough, lift gently until you feel resistance.
- Stretch that side up and fold it over the top toward the center.
- Rotate the bowl 90°, repeat until you’ve folded all four sides (4 folds total).
- Do 4 sets total, spaced 30 minutes apart during bulk fermentation.
- Each set takes about 20–30 seconds; be gentle—you're building structure, not tearing.
- Watch for visible change: dough should go from ragged to smoother and slightly domed.
Pro tips:
- If dough resists, stop stretching. Give it 10–15 minutes and try again.
- Use a bench scraper to help fold if dough is extra sticky.
Troubleshooting Common Issues with Stretch and Folds

-
Problem: dough tears easily.
- Fix: more rest between sets; lower strength of stretch. Try coil folds instead of aggressive stretches.
-
Problem: dough still slack after 4 sets.
- Fix: add 1–2 more sets, spaced 30 minutes apart. Check starter activity—weak starter needs more time.
-
Problem: dough sticks to bowl.
- Fix: lightly oil the bowl or use a dough scraper to lift without stretching.
Warning: don’t overwork the dough. Too many folds can make it tight and resistant to rise.
Final Proofing, Baking, and Storage Tips for Stronger Sourdough Dough

After your final stretch and fold, shape gently and place into a floured proofing basket. For stronger sourdough dough structure, cold retard in the fridge 8–12 hours for flavor and ease of scoring. Preheat your oven with a dutch oven to 250°C/480°F, score, then bake covered 20 minutes, uncovered 20–25 minutes until deep brown.
Storage:
- Keep cooled loaf in a paper bag for 2–3 days.
- Freeze sliced bread for longer storage.
Which tip will you try first? Stretch and folds for stronger sourdough dough are a simple change that gives clear results. Pin this guide for your next bake, save it for reference, and share with friends who handle wet dough. Ready to make this happen? Let's do it!