
You pulled a beautiful loaf from the oven only to find it heavy and tight. If you’ve ever wondered how to fix dense sourdough bread next time, you’re in the right place. You’ll learn simple, practical fixes that stop dense crumb at the source.
This guide walks you through key causes—starter activity, hydration, gluten development, proofing—and gives step-by-step adjustments you can apply for your next bake. Read on and you’ll be ready to bake lighter, airier sourdough the next time.
What You'll Need (ingredients + tools for a lighter loaf)
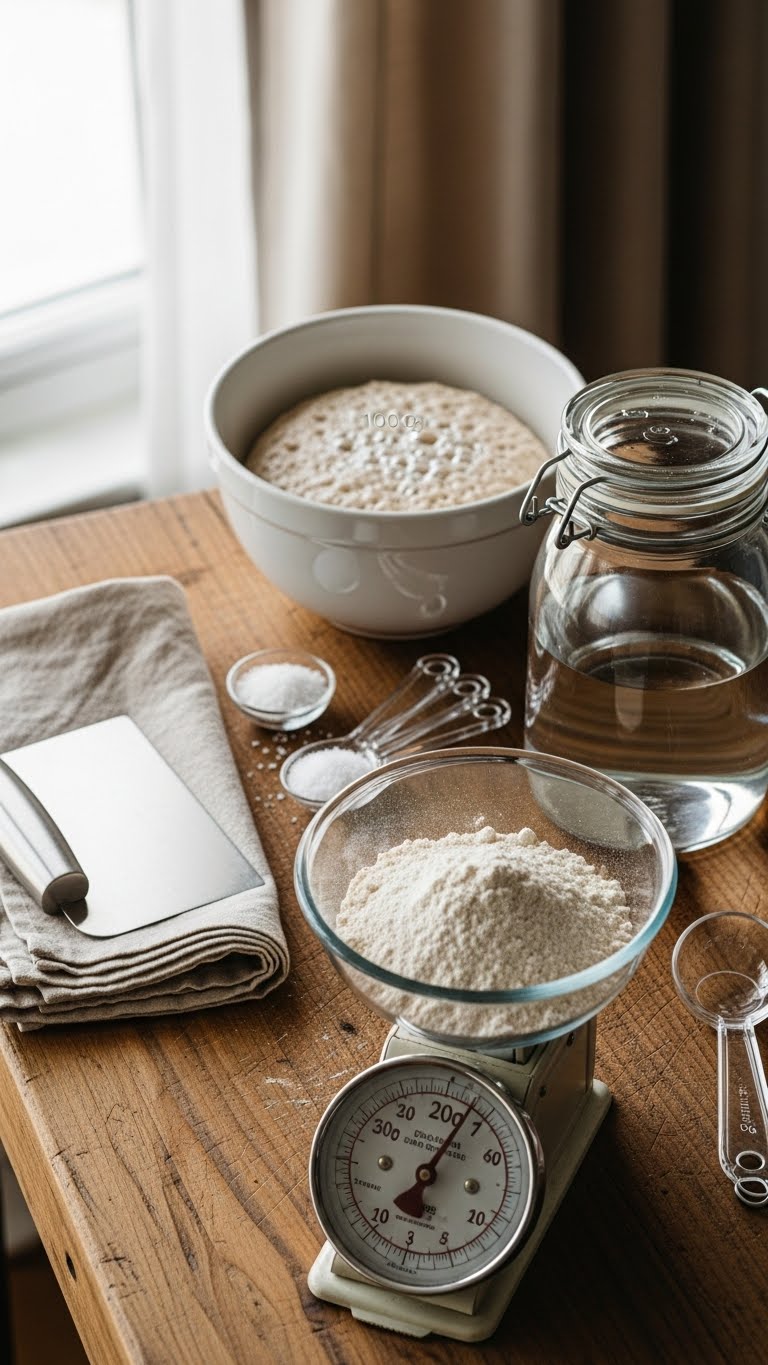
- 500g bread flour (or blend with up to 20% whole grain)
- 350–375g water for 70–75% hydration (adjust if your flour is thirsty)
- 100g active starter (fed 6–12 hours before use)
- 10g salt
- Tools: scale, bench scraper, banneton, Dutch oven, thermometer
Quick tips:
- Use strong bread flour for better gluten.
- Feed starter so it's bubbly and doubles before mixing.
- Measure by weight for consistency.
Preparing Your Starter & Dough (boost activity and hydration)
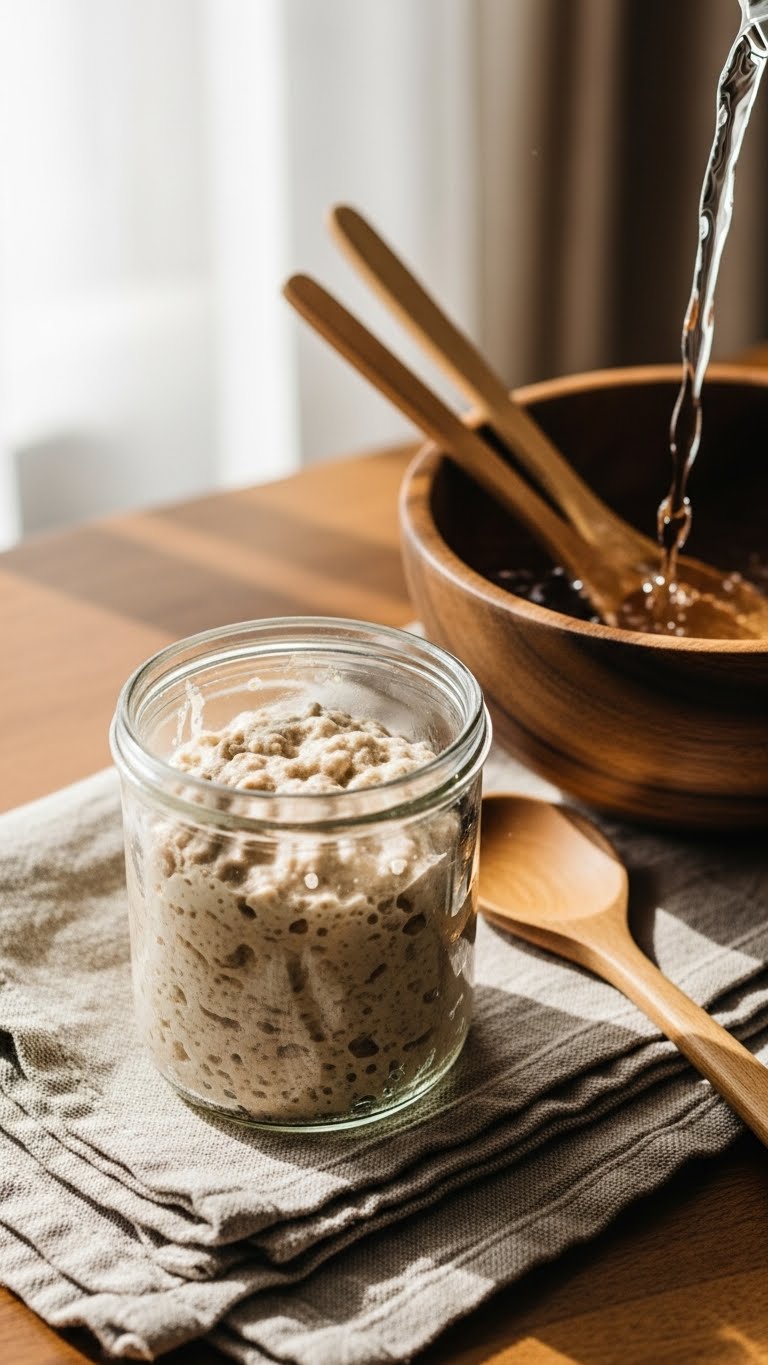
Start by checking your starter:
- Feed it with a 1:2:2 ratio (starter:water:flour).
- Wait until it doubles and is bubbly—this signals peak activity.
Autolyse and hydration:
- Combine flour + 90% of water and rest 30–60 minutes. This improves gluten formation.
- Add starter and salt after autolyse.
- If your dough felt tight previously, increase hydration by 5–10% next time.
Why this matters:
- Underactive starter and low hydration are common causes of dense crumb.
- Autolyse gives gluten a head start without overworking the dough.
Shaping, Proofing & Baking (step-by-step to avoid density)
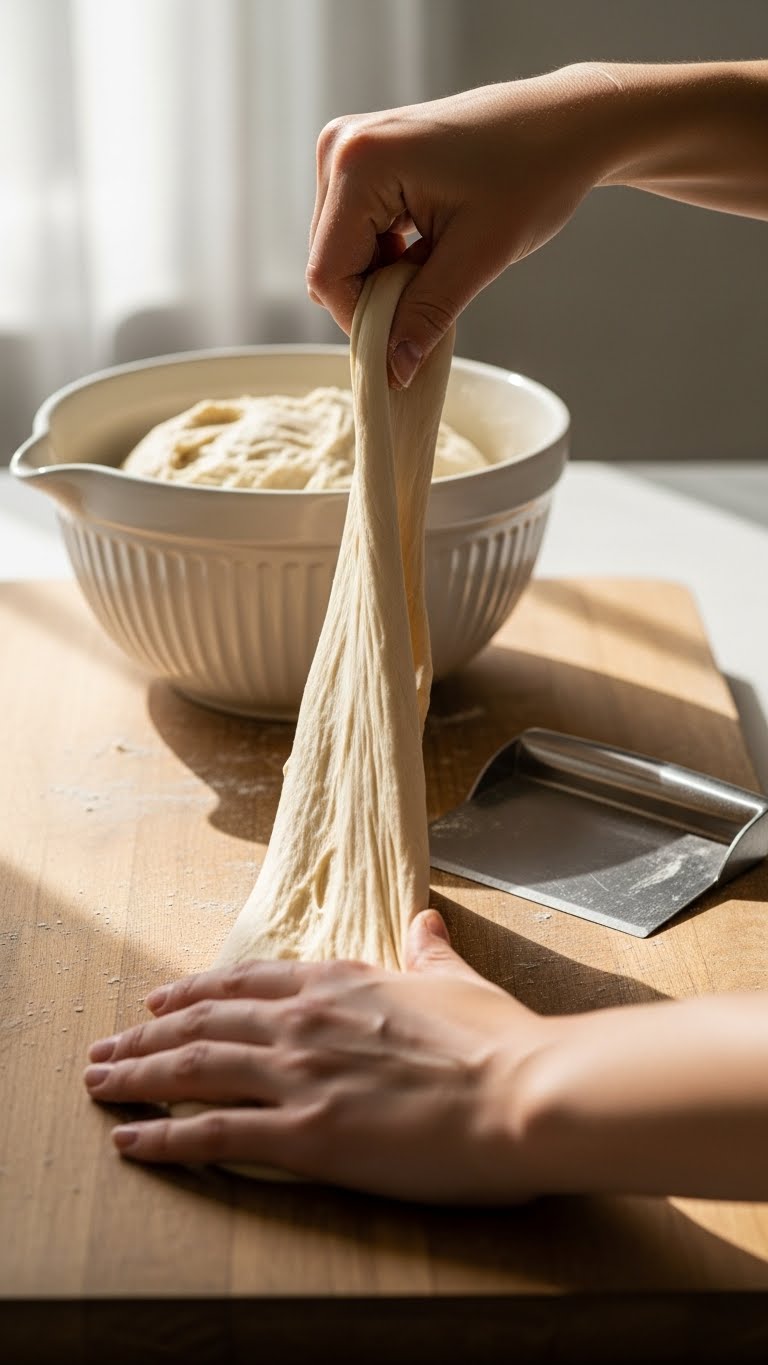
- Bulk fermentation
- Perform 3–4 sets of stretch-and-fold, spaced 30 minutes apart.
- Bulk ferment 3–5 hours at room temp, or until dough increases ~30–50% and shows bubbles.
- Shaping
- Pre-shape gently, bench rest 20–30 minutes, then final shape with tension.
- Use a banneton lined with flour for structure.
- Proofing
- For lighter crumb, try cold retardation: refrigerate for 12–16 hours.
- Avoid overproofing—if dough collapses, it’ll be flat and dense.
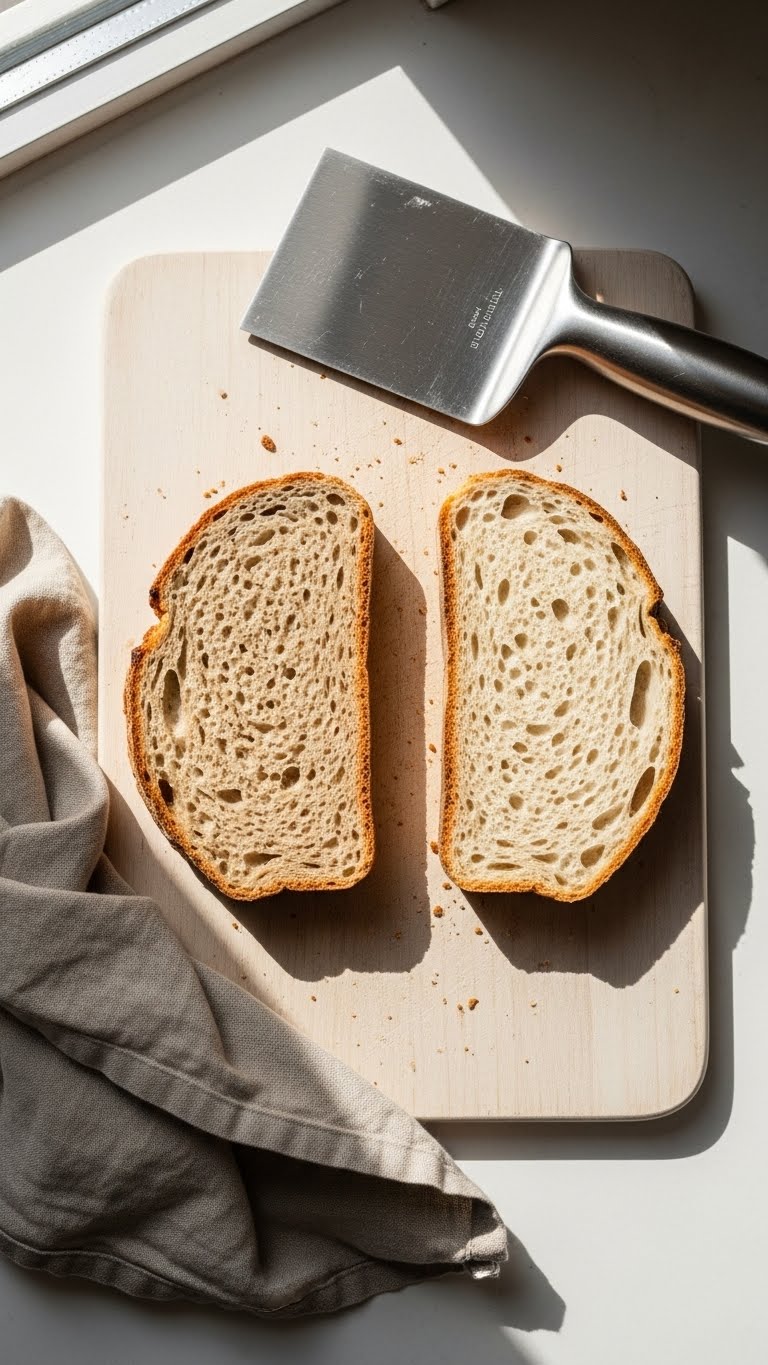
- Baking
- Preheat your Dutch oven to 230–260°C (450–500°F) for 45 minutes.
- Score and bake covered 20 minutes with steam, then 20–25 minutes uncovered until deep brown.
- Let cool at least 1.5–2 hours; cutting too early yields gummy texture.
Pro tips:
- Test readiness with the poke test: gently press—dough should spring back slowly.
- Use a thermometer: internal loaf temp >96°C (205°F) signals done.
Troubleshooting Dense Sourdough & Quick Fixes
Common causes and fixes:
- Underactive starter → feed 6–12 hours pre-bake; keep starter at room temp when active.
- Low hydration → increase water by 5–10% next bake.
- Poor gluten development → add another 30–60 min autolyse or extra stretch-and-folds.
- Overproofing → shorten bulk or proof time; use fridge for controlled retard.
- Too much whole grain → reduce to ≤20% whole grain, or increase hydration more.
Quick recovery for a dense loaf:
- Re-slice and toast for sandwiches.
- Repurpose into breadcrumbs or croutons.
- For future loaves, adjust one variable at a time.

You now know how to fix dense sourdough bread next time by tuning starter activity, hydration, gluten work, and proofing. Try one change per bake and keep notes so you learn what your kitchen needs.
Pin this guide for your next bake and save it for quick troubleshooting. Which tip will you try first? Ready to make this happen? Let's do it!