
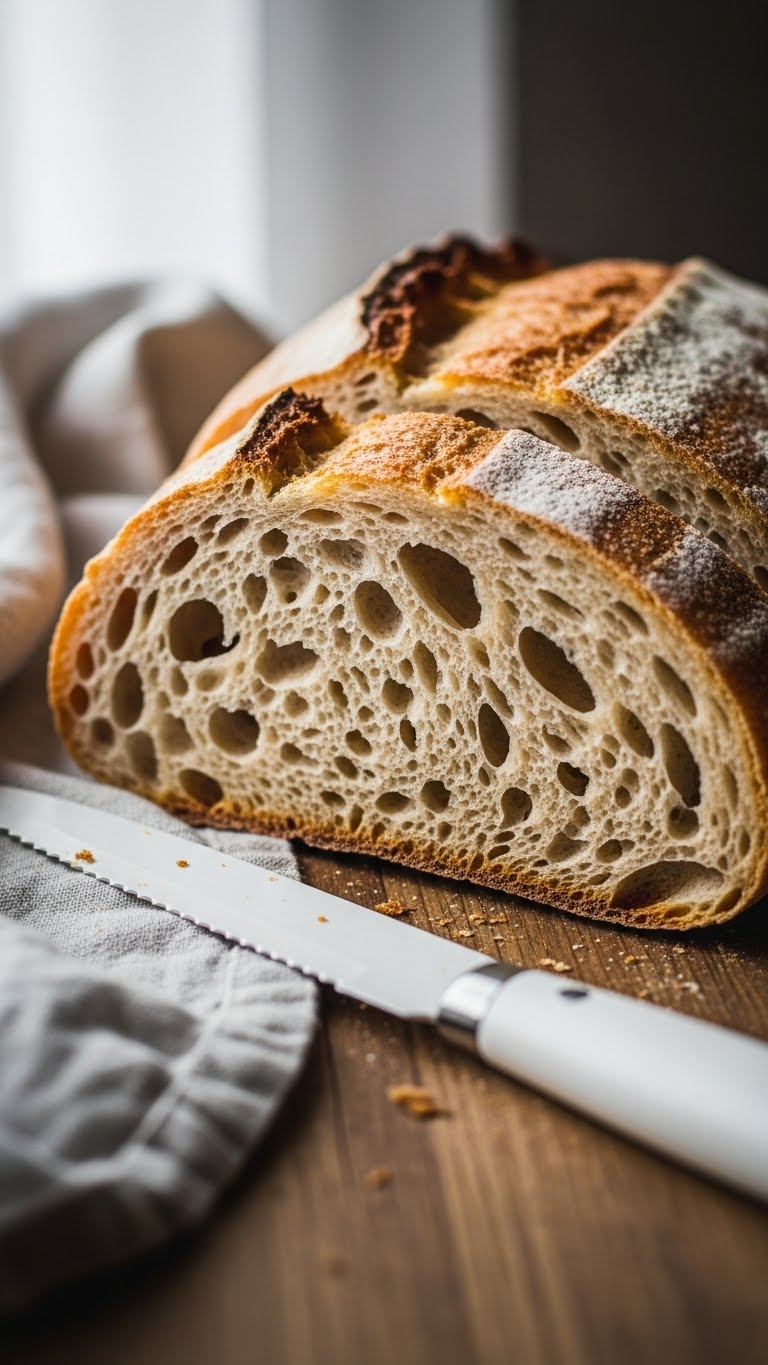
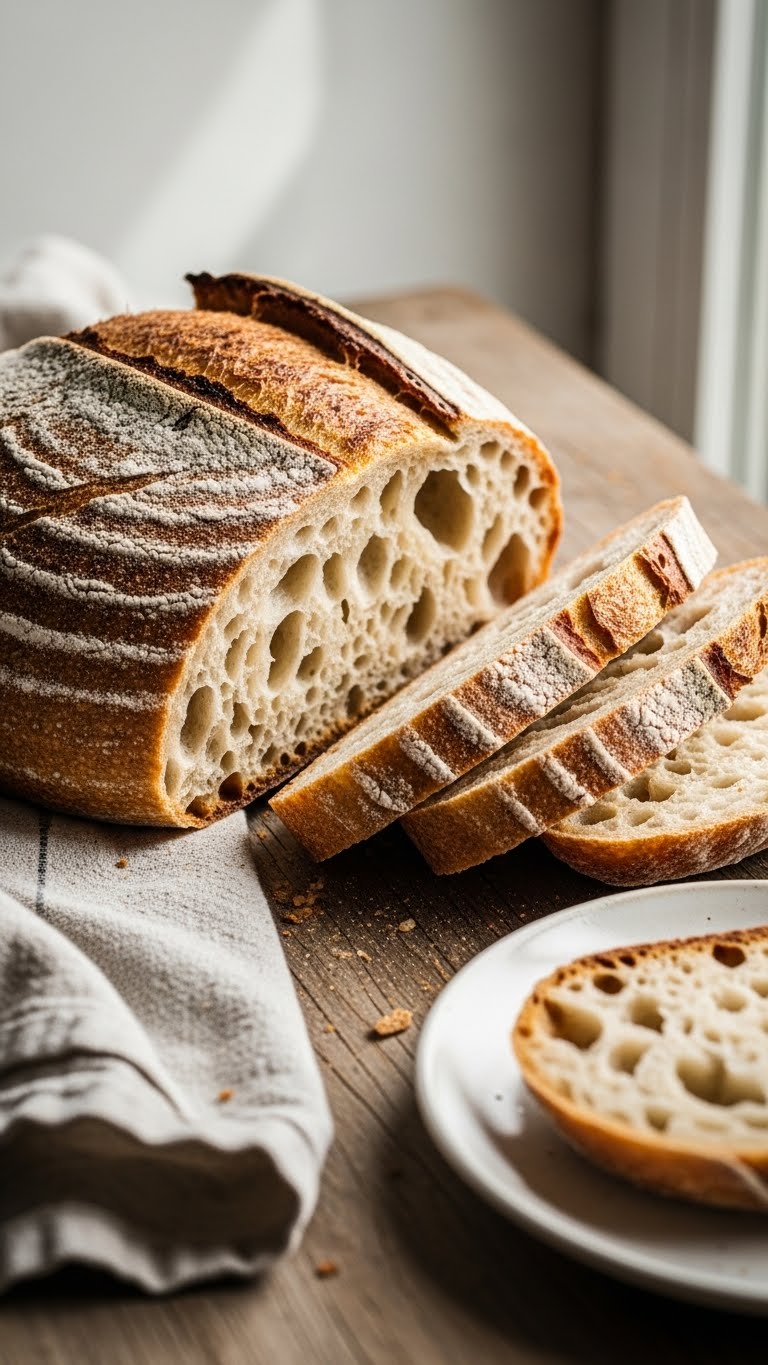
You’ve baked sourdough loaves that look great but slice into a tight, gummy crumb. You want that airy, open interior—large irregular holes and a light texture. This guide shows exactly how to get an open crumb structure in sourdough bread using simple, repeatable steps you can try today.
You’ll learn the right hydration, how long to autolyse, effective stretch-and-folds, shaping tricks, and proofing windows that encourage big holes. Follow these practical tips and timelines to see a visible change in your next bake.
What You'll Need for an Open Crumb
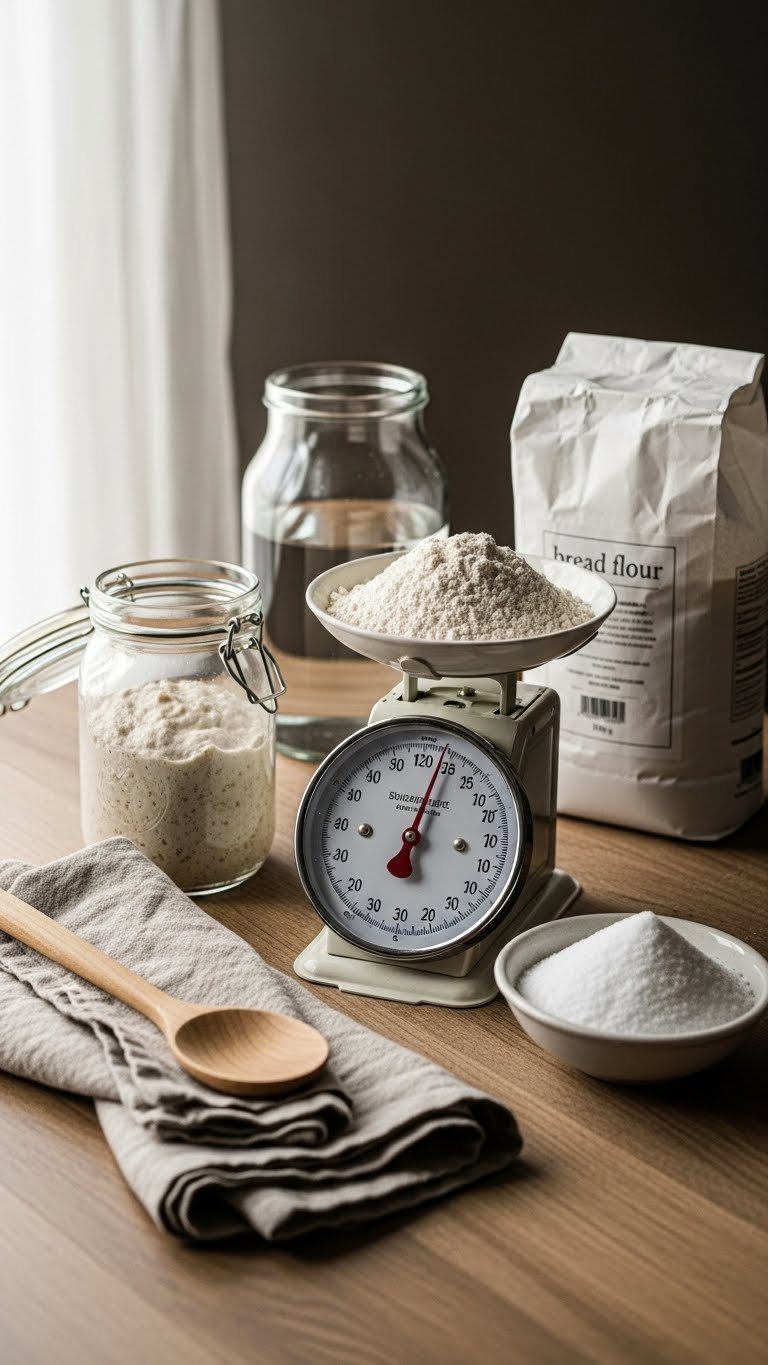
Gather these ingredients and tools before you start. Being organized cuts stress and improves results.
- Ingredients:
- 500g bread flour (or 450g bread + 50g whole wheat)
- 360–375g water (72–75% hydration) — adjust by feel
- 10g salt (2%)
- 100g active starter (fed 4–8 hours before use)
- Tools:
- Digital scale, bench scraper, Dutch oven or combo cooker, proofing basket, linen cloth
Tip: Use a vigorous starter. If your starter floats in water, it’s strong enough to give good oven spring and help open crumb structure in sourdough bread.
Getting Started: Hydration, Autolyse, and Starter Strength
Small changes here make the biggest difference.
- Hydration: Aim 72–75% hydration for most bakers. Higher hydration helps holes but demands better handling.
- Autolyse: Mix flour and water, rest 30–60 minutes. This hydrates flour and helps gluten form without kneading.
- Starter: Use an active starter fed and bubbly. 100g (20% of flour weight) is a reliable starting point.
Warning: If dough is too wet for your skill level, reduce water by 5–10%. You can increase hydration as you gain confidence.
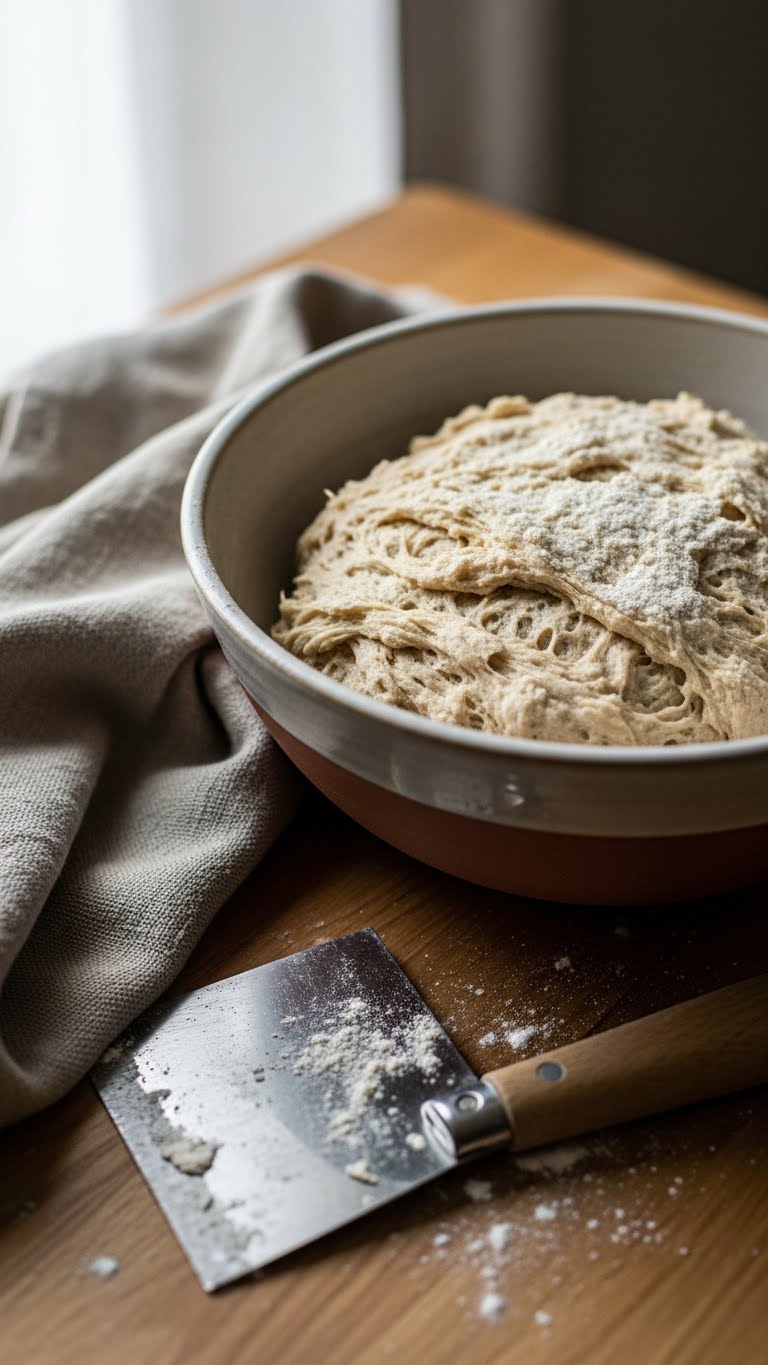
Technique Step-by-Step for an Open Crumb
Follow these sequential steps closely.
- Mix: Combine 500g flour, 360–375g water, and 100g starter. Mix until no dry flour remains. Rest 30–60 minutes (autolyse).
- Add salt: Sprinkle 10g salt and mix gently until incorporated.
- Bulk fermentation and folds:
- Room temp 22–24°C: bulk fermentation 3–5 hours.
- Perform 4–6 stretch-and-folds every 30–45 minutes during the first 2–3 hours.
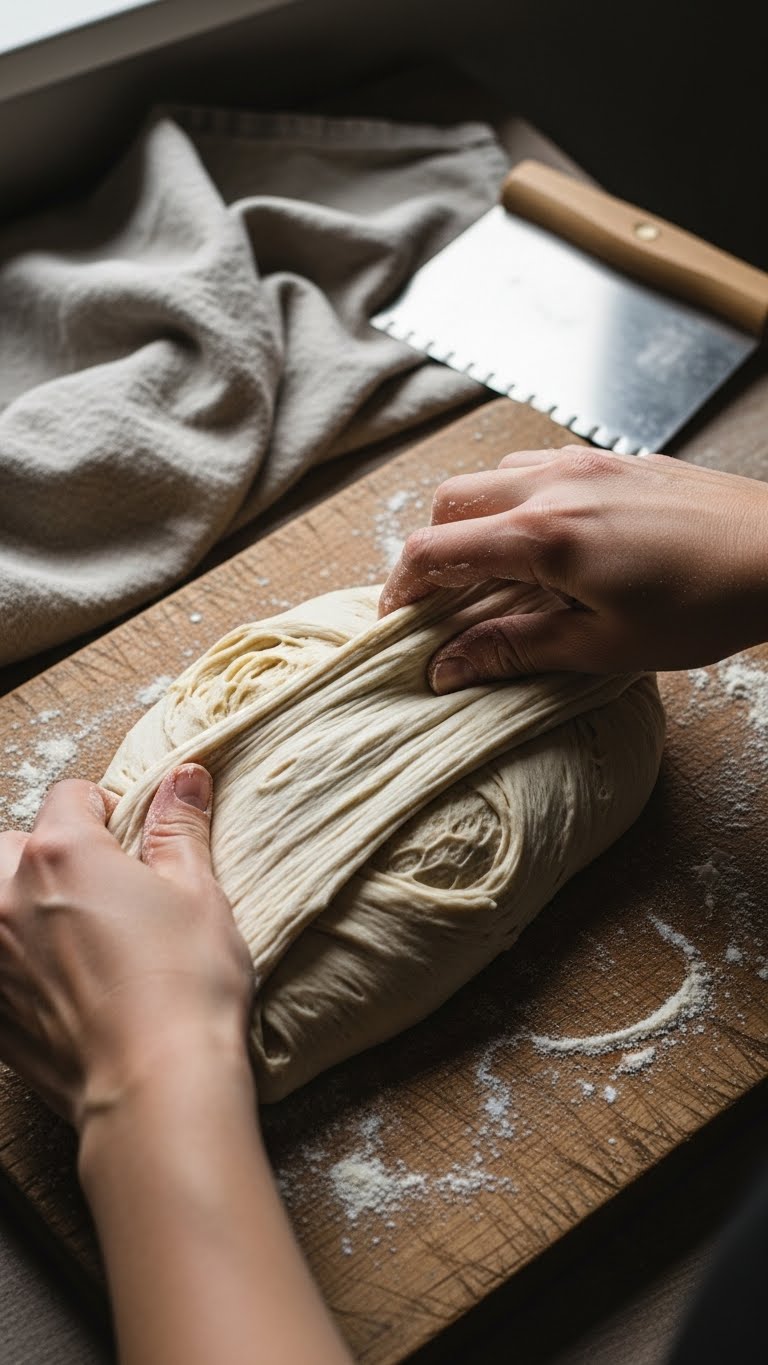
- Pre-shape and bench rest: Lightly pre-shape, rest 20–30 minutes.
- Final shape: Use a tight, tensioned boule or batard shape.
- Proof: Proof at room temp 1.5–3 hours, or cold retard 10–18 hours in the fridge for flavor and structure.
- Bake: Preheat Dutch oven to 250°C / 480°F. Bake covered 20–25 minutes, then uncovered 20–25 minutes until deep brown.
Pro tips:
- Be gentle when shaping to preserve gas pockets.
- Use a sharp lame for confident scoring to help expansion.
- Rotate baking times based on crust color rather than exact minutes.
Troubleshooting Common Open Crumb Issues
If your crumb stays tight, check this list.
- Underproofed dough: Large holes need a fully relaxed dough. If it springs back quickly, give more time.
- Overhandled dough: Excessive degassing removes gas. Handle gently when shaping.
- Weak starter: Use a well-fed starter to ensure good rise.
- Low hydration: Try adding 5–10% more water gradually.
- Too few folds: Stretch-and-folds build strength without kneading. Do at least 4 folds.
Quick fixes:
- Next bake, increase autolyse by 15–30 minutes.
- Try a longer cold proof for better oven spring.
- Practice coil folds for improved dough strength.
You’ll notice that small adjustments yield noticeable gains. Keep a baking log so you can track hydration, timing, and temperatures.
You’re ready to bake with confidence and aim for that airy, open crumb structure in sourdough bread. Try one change at a time—hydrate more, lengthen autolyse, or refine your folds—and note the result. Pin this guide for your next bake and share it with fellow bakers who want bigger holes. Which tip will you try first? Ready to make this happen? Let's do it!