
You want fresh sourdough but you're gluten free — and you don't want complicated science experiments. This guide shows you exactly how to make gluten free sourdough starter and bread at home, step by step. You'll learn how to feed and build a bubbly starter, mix and shape a simple gluten free sourdough loaf, and avoid common mistakes.
Follow these clear steps and realistic timings so you can bake a tasty, tangy loaf you’ll actually eat.
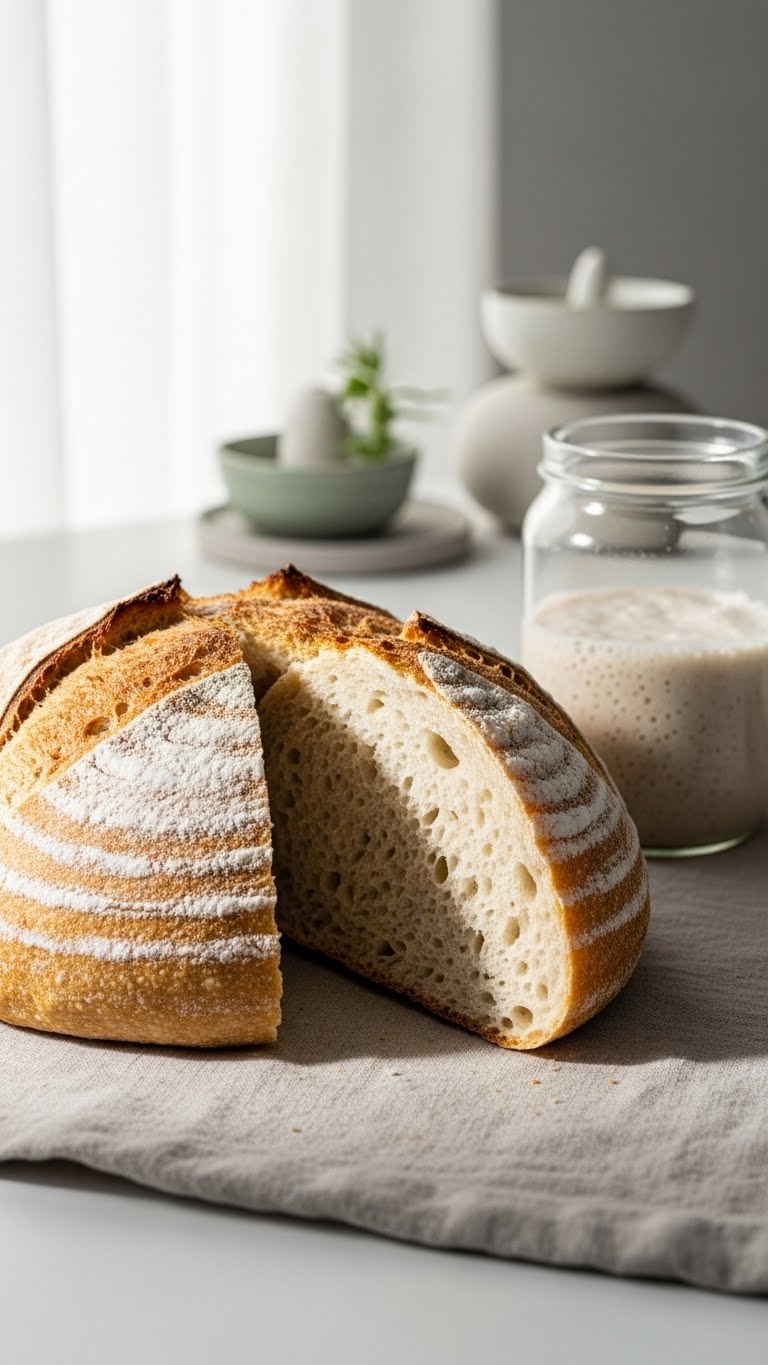
What You'll Need for Gluten Free Sourdough Starter and Bread
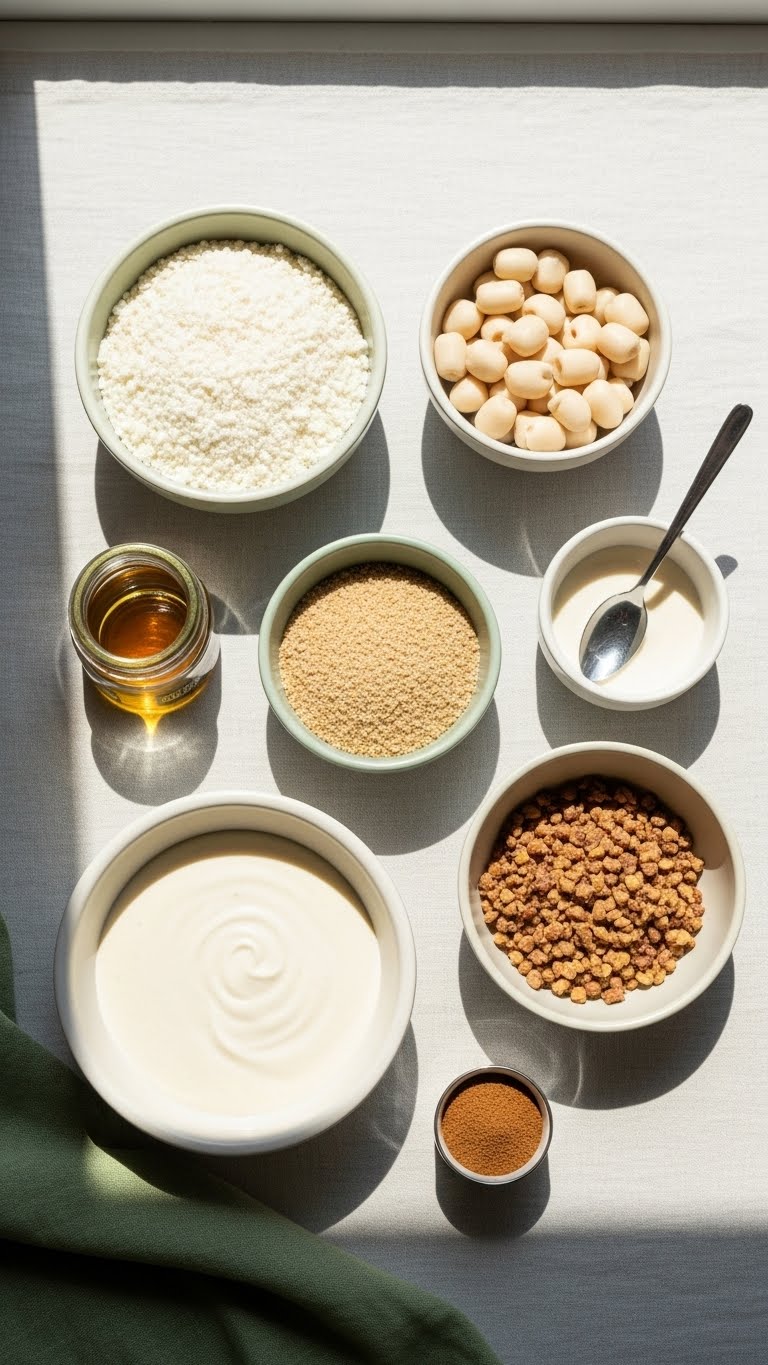
- Starter ingredients:
- 50 g brown rice flour (or a 1:1 gluten-free blend)
- 50 g filtered water at room temperature
- Bread ingredients (for 1 loaf):
- 300 g gluten-free flour blend (rice + sorghum + tapioca or a store mix)
- 360 g water (70–75% hydration)
- 9 g salt
- 90–120 g active starter (see starter steps)
- Tools:
- Digital scale, measuring spoons, mixing bowl, proofing basket or bowl lined with linen, Dutch oven or baking sheet
Tip: Use filtered water if your tap is chlorinated — it slows fermentation.
Building and Feeding Your Gluten Free Sourdough Starter
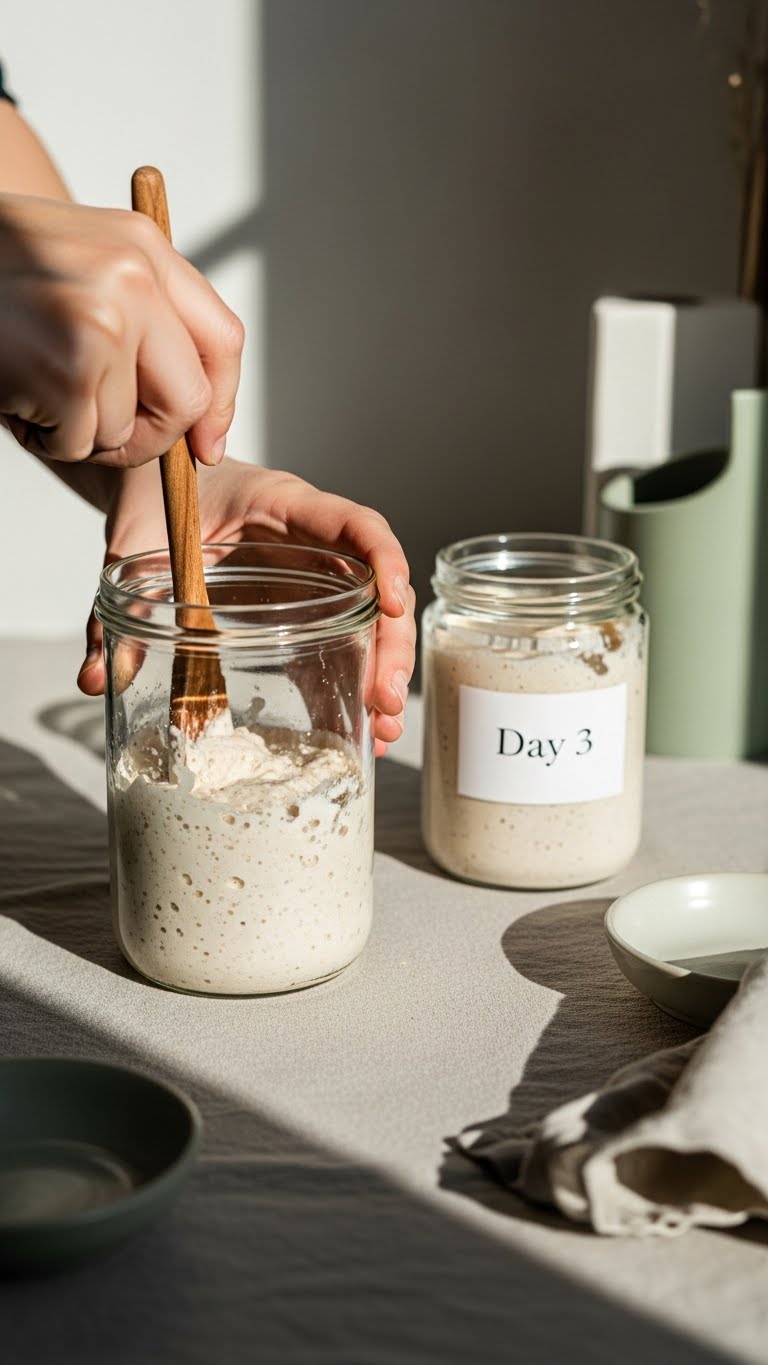
- Day 1: Mix 50 g brown rice flour + 50 g water in a clean jar. Cover loosely. Leave at room temp (70–75°F).
- Days 2–5: Each 24 hours, discard half, then feed with 50 g flour + 50 g water.
- Around day 5–7: Look for bubbles, a tangy smell, and doubling within 8–12 hours after feeding — this means your starter is active.
Tips:
- Use a glass jar and mark the level to track rise.
- If your starter smells like nail polish remover, feed it twice daily and keep it warmer (75–78°F).
- For faster build, use a mix of brown rice + sorghum flour; for milder flavor, stick to brown rice only.
Mixing, Fermenting, and Shaping Gluten Free Sourdough Bread
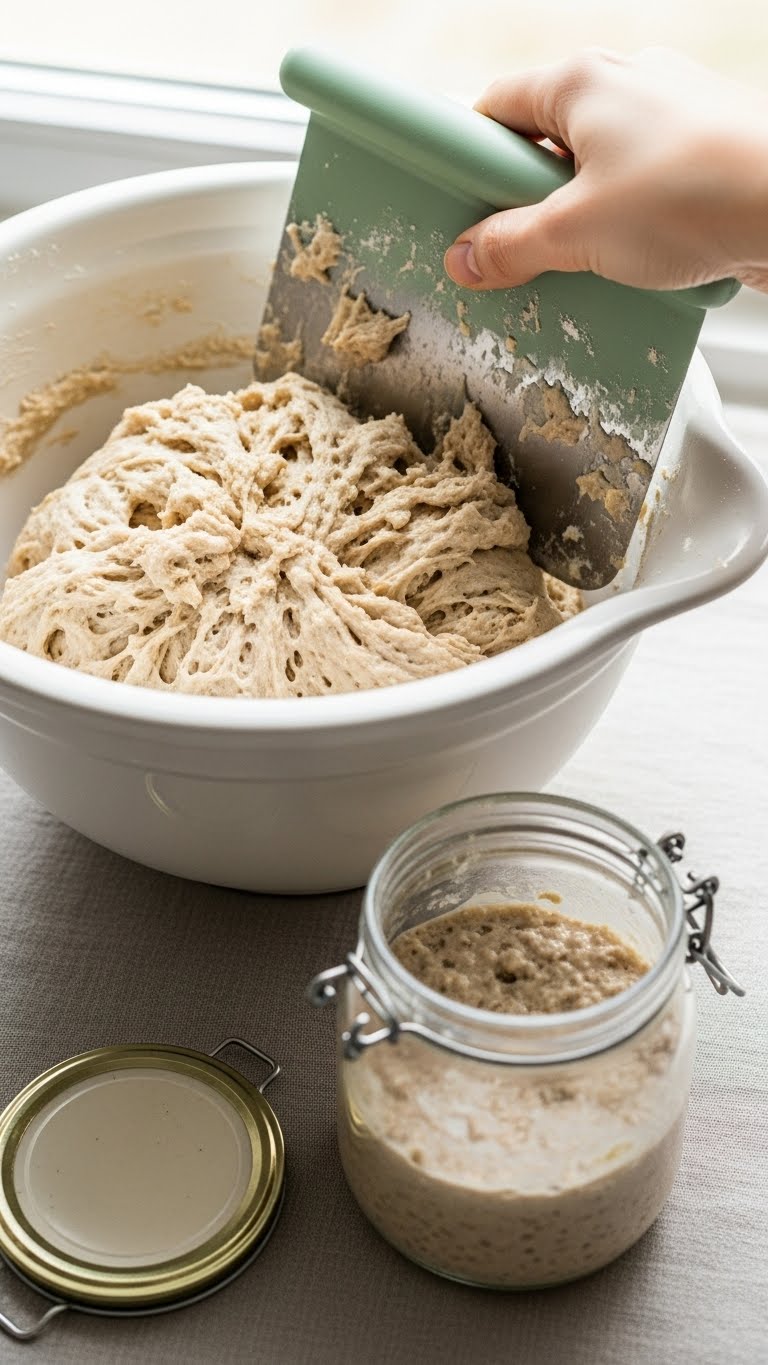
-
Mix:
- In a bowl, whisk 360 g water and 90–120 g active starter until smooth.
- Add 300 g gluten-free flour blend and mix until combined; rest 30 minutes (autolyse).
- Add 9 g salt, fold gently until incorporated.
-
Bulk Ferment:
- Let dough ferment at room temp for 4–6 hours. Since gluten free dough doesn’t develop gluten, look for slight rise and air pockets.
- Every 30–60 minutes during the first 2 hours, perform gentle folds to help structure.
-
Shape:
- Transfer dough to a well-floured linen-lined basket. Smooth the top with wet hands.
- Cover and refrigerate for 2–8 hours for a cold proof (optional, adds flavor).
-
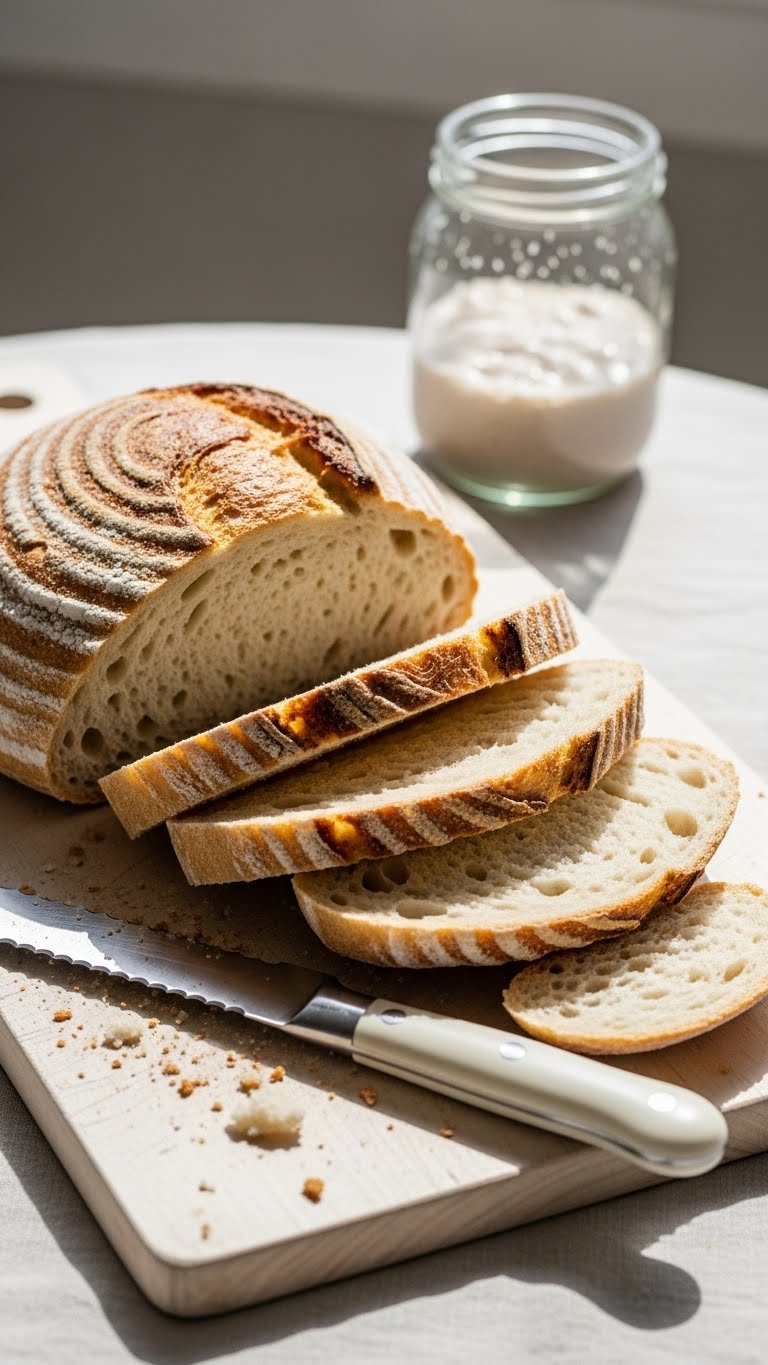
Bake:
- Preheat Dutch oven to 450°F (230°C) for 45 minutes.
- Score dough, transfer to hot Dutch oven, cover, and bake 20 minutes covered, then 20–25 minutes uncovered until deep golden-brown.
- Cool fully on a rack before slicing—at least 2 hours.
Quick tip: Use a rice flour dusting to prevent sticking; avoid overbaking which dries gluten free crumb.
Troubleshooting and Storage Tips for Gluten Free Sourdough
- Flat loaf? Try a colder final proof and a hotter oven up front (dutch oven). Increase starter from 90 g to 120 g for a stronger rise.
- Gummy crumb? Bake longer and let loaf cool fully. Reduce hydration by 10–20 g next time.
- Starter slow to bubble? Feed twice daily and keep in a warmer spot (75–78°F).
Storage:
- Store baked loaf in a linen bag at room temp up to 48 hours.
- Freeze sliced bread up to 3 months; toast from frozen.
- Refrigerate starter if baking weekly; feed once a week. For daily baking, keep starter at room temp and feed daily.
Pin-worthy tip: Make a double batch and freeze shaped dough in a loaf pan for a quick bake day.
You can master how to make gluten free sourdough starter and bread with patience and a few simple rituals. Once your starter is lively, baking shifts from guesswork to a repeatable routine. Pin this guide for your next baking day and save time with the troubleshooting tips.
Which tip will you try first — longer cold proof, a slightly lower hydration, or doubling your starter? Pin this guide for your next baking day and share with a friend who wants gluten-free sourdough too!