
You’ve shaped a gorgeous sourdough but the final loaf spreads or sticks during proofing. If you want bakery-shaped rounds with crisp edges, learning How to Use a Banneton Basket for Perfect Sourdough Shape makes that difference. This guide shows you how to prep the banneton, dust it correctly, transfer dough without deflating it, and proof for a tight, even rise. You’ll get clear, actionable steps you can use right away.
What You'll Need (banneton basket & tools)
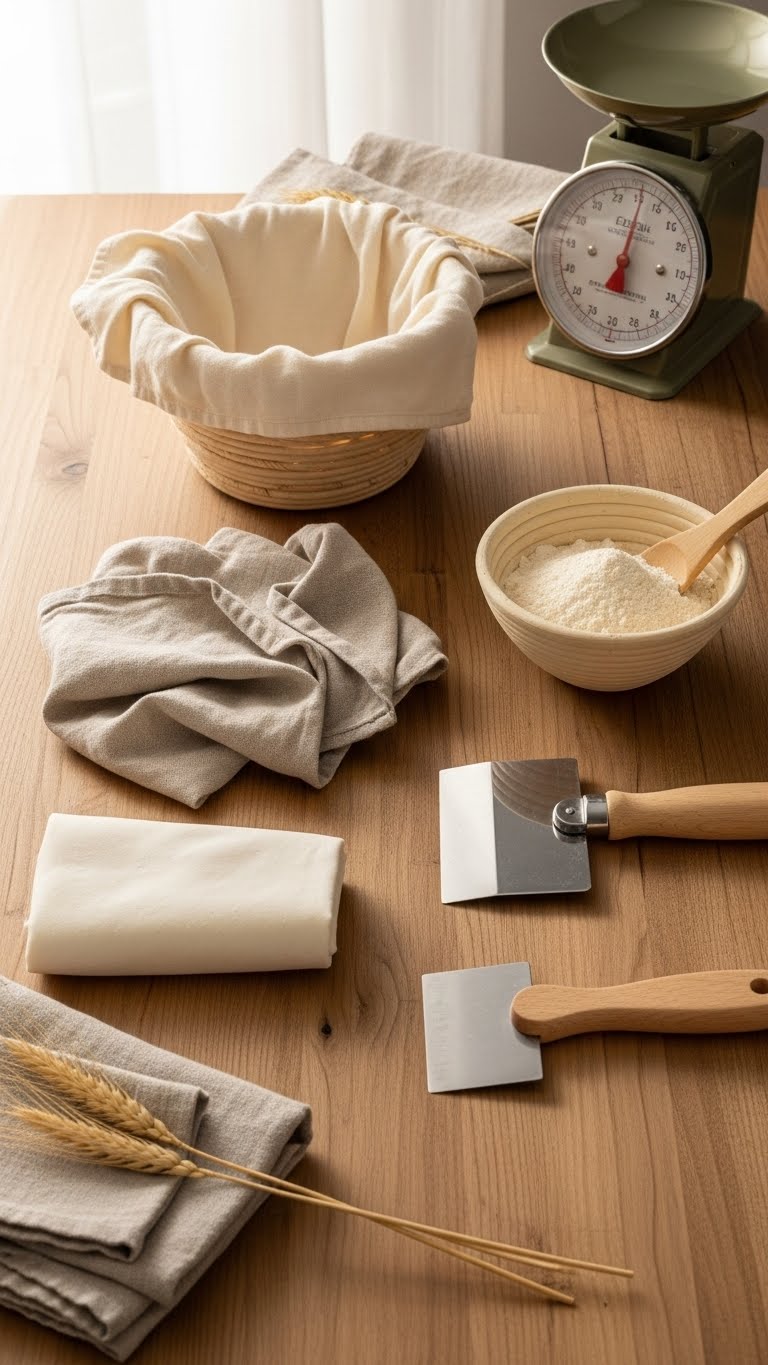
- Banneton basket (rattan or cane) — round or oval depending on loaf shape
- Rice flour or a 1:1 mix of rice + all-purpose flour for dusting
- Linen cloth (optional) to line the banneton
- Scale, bench scraper, and proofing surface
- Plastic wrap or a large plastic bag for covering
Quick tips:
- Use 200–300 g of dough per small round loaf, 700–900 g for a large boule.
- Dust generously for sticky wet doughs; use less for stiff doughs.
- Keep everything within arm’s reach to avoid handling the dough too much.
Getting Started (prepping your proofing basket)
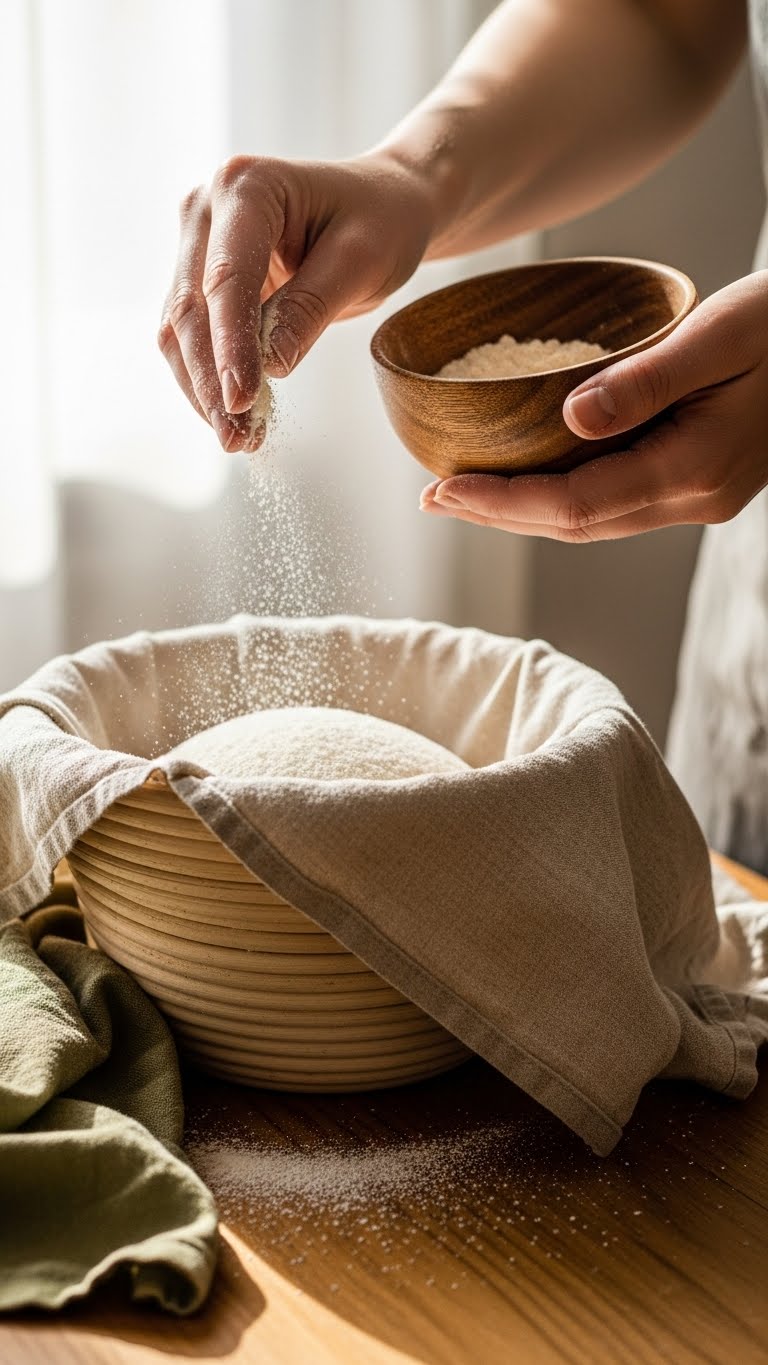
- Place the banneton on your work surface. If new, wipe it with a dry brush to remove loose fibers.
- Dust the basket thoroughly with rice flour or the rice/all-purpose mix until the spiral pattern is lightly coated.
- If you prefer softer edges, line the banneton with a lightly oiled linen cloth dusted with flour. This also helps with very sticky doughs.
Warning: never use wet flour to dust—it clumps. For very wet doughs (hydration 75%+), increase rice flour slightly to prevent sticking.
The Technique Step-by-Step (shaping sourdough and proofing)
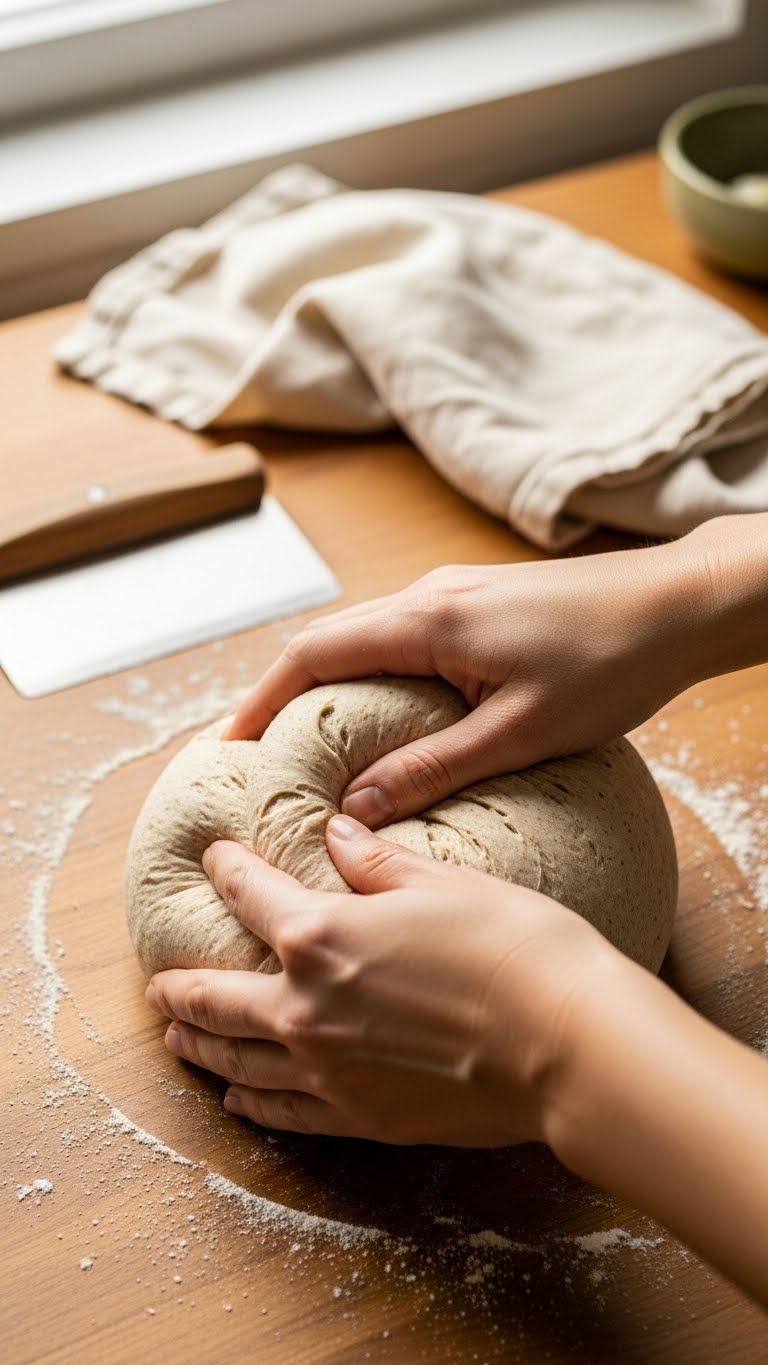
- After bulk fermentation, do a gentle pre-shape and rest 15–20 minutes.
- Final-shape the dough: create surface tension by tucking edges under and rotating the dough against the counter for 10–20 seconds.
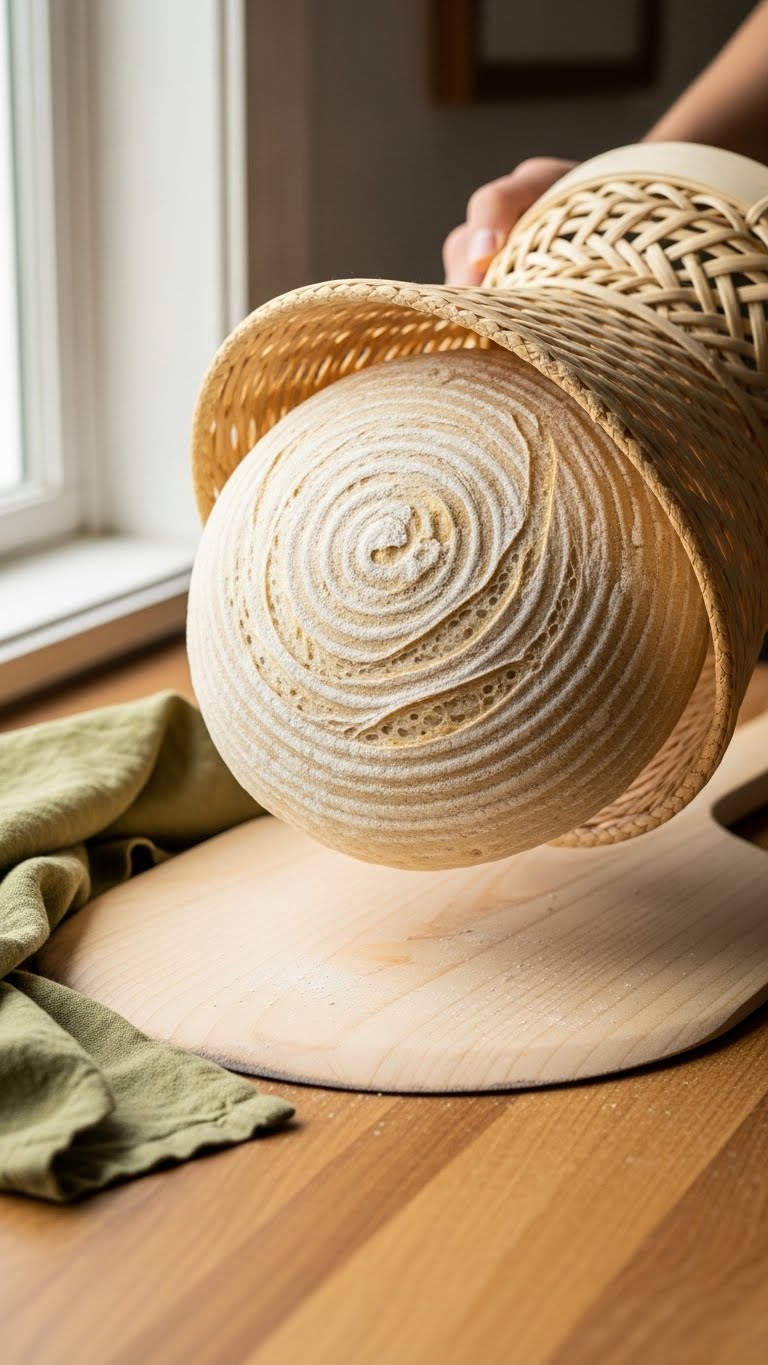
- Place the boule seam-side up into the dusted banneton. The spiral pattern helps guide scoring later.
- Cover with a plastic bag or damp cloth to prevent a skin forming.
- Proof times:
- Room temp: 1–3 hours (depends on room temp and starter activity)
- Cold proof: 8–18 hours in the fridge for better flavor and easier scoring
Pro tricks:
- For a sharper edge, give the final tighten a firm but gentle pull using the bench scraper.
- If you want a patterned crust, press a lightly floured linen into the dough before final proof.
Troubleshooting Common Issues (banneton care & proofing fixes)
- Dough sticks to banneton: Dust more liberally with rice flour next time and use a linen liner for sticky batches.
- Dough collapses when transferring: Your dough may be over-proofed. Shorten room-temp proof or move to cold proof earlier.
- Dull crust or uneven rise: Check your scoring—score deep enough (about ¼–½ inch) and preheat your oven with steam.
- Banneton odor or mold: Air-dry it fully; brush clean with a stiff brush. Don’t wash with soap—moisture invites mold.
Storage and care:
- Store banneton dry and open to air.
- Occasionally bake it empty at low heat (200°F / 95°C) for 30 minutes to dry and deodorize.
Make-ahead and time-savers:
- Dust several bannetons in advance and keep them covered.
- Use cold proof to fit your schedule—shape tonight, bake tomorrow morning.
You now know How to Use a Banneton Basket for Perfect Sourdough Shape: how to prep, shape, proof, and rescue common problems. Practice a few times—the first few loaves will teach you your starter's timing. Pin this guide for your next bake and save it to your sourdough board. Which tip will you try first: rice flour dusting, cold proofing, or a new shaping technique? Ready to make this happen? Let’s do it!